Wednesday, November 11, 2015

Inspirational Wednesday - New Baby Card

Welcome to another Inspirational Wednesday post. 
Today's inspiration comes from many places. As I was paying bills (yuck not my favorite thing to do lol) I was updating my bill tracker (something I came up) and while looking for the file I came across my file for digital stamp images for The Greeting Farm. I decided to open it and see if I had a Thanksgivingy (i know not a real word or at least not spelled right) kind of image. I did not but I do have the Pregnant Anya one (I don't you can get this one anymore) and thought this would work instead.  I have a good friend that is going to be having her third baby. I also have this cute stamp that i have been wanting to use for a while and it works great for this too.  So those three things are what made up today's card.
I printed her out on to some copic quality paper (sized her about 2x3). I tried to color her to match my friend's hair color and skin color. I used N8 and 100 for her hair as well as shoes and E11 for her skin. I also used a little R20 for her cheeks and eye lids. I then took B02 and used a little for the top of her tummy bump, under her arms as well as for her under shirt. Then I took B000 to color the rest of her top and blend out the B02. For her pants I used G14 and some G17 for the shadow as well as for her hair band. I took a heart shaped enamel dot and used it where the little heart was in her hair. 
I have made my card base to be 4.25x4.25. I used my corner chomper to round the corners, I used the 1/8 side. The pattern paper is from Nana's Nursery Baby Boy paper pad.  She is pretty sure she is having a boy (she will know for sure in a month or so) since she is not 100% sure I thought these colors would work for a gender neutral card too. I timed it down just shy of 4.25 all around. I just used my ATG tape and stuck it in place after rounding the corn to match the card base. I then add my image to the bottom. I really wanted the paper to speak as the sentiment.
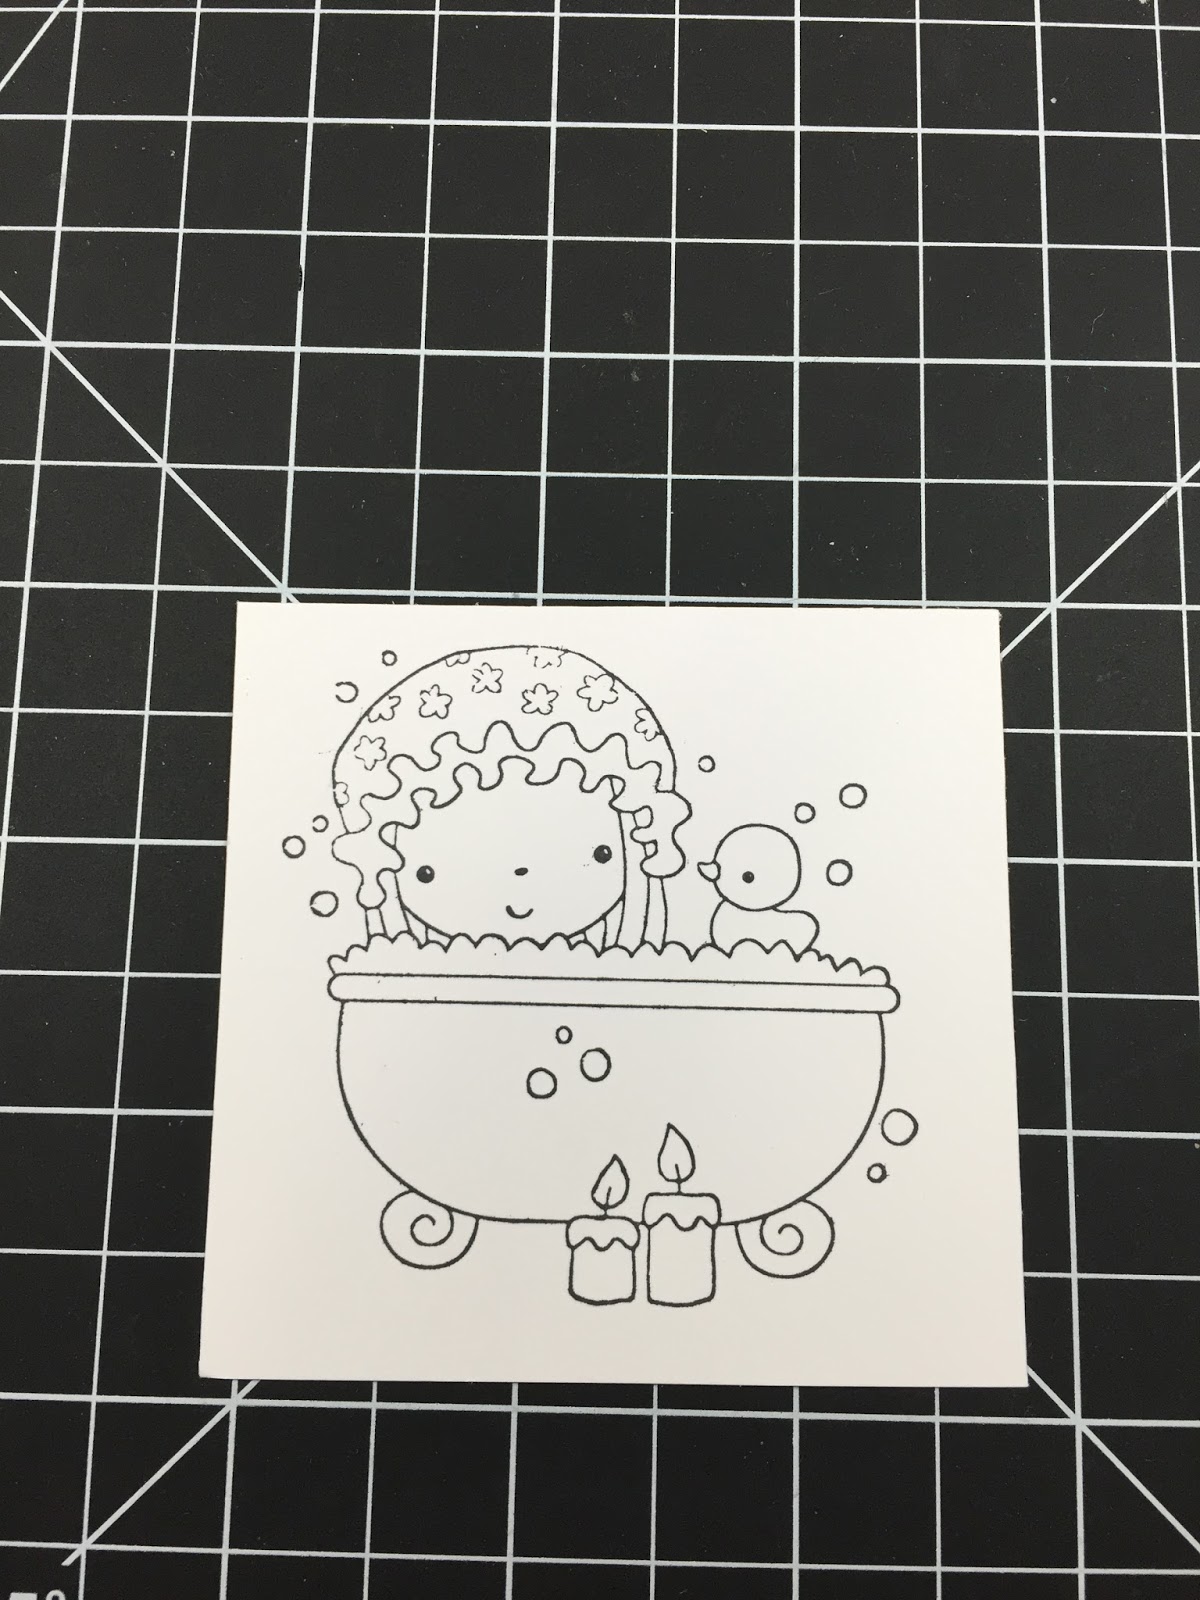
As for the inside I used this stamp that I got a long while ago on clearance at I believe Michaels. I thought this is such a great sentiment for any baby card and was really glad to be able to final use it. I stamped it with VersaFine ink.
This card is just so cute. I just cant get over how cute it looks. It's so simple and yet has so much beauty to it. Thanks for joining me today and I hope you have a wonder rest of your week.
Happy Crafting


Most of the supplies I used

Monday, November 9, 2015

Cut It Out Monday - Thanksgiving Day Place card

Happy Monday.
I hope everyone had a good weekend? I had a productive one even though I did not get everything done that I wanted to. But I did play around on the Cricut Design Space App on my iPad and came up with today's project.

Now I will say that when I was playing around I did not see that Cricut already had a Make It Now project for place cards. I did go in and look at that project and even though I have the subscription it still would have cost me $4.99 because of the type of font that they are using I don't have that one (I am trying not to spend any money this month). I decided to share with you the ones I came up with since everything in them are free.

I thought that this year I would do a little decorating for Thanksgiving since we will be having family over (and I am better prepared this year) and thought it would be fun if I made place cards for everyone, even though I know that they will not stay where I place them because someone is going to want to move to sit next to the grandparents or cousins what have you.
I think I might change the color of the paper when I make the rest but other wise this turned out nice. I really like the calligraphy pen too. It's the medium calligraphy pen from the multi pack of Cricut pens you can find at Joann's and Michaels. 
I cut it with the image on both sides but you can just have a solid circle in the back too.I cut a little off the bottom just to show that it can be done and sit flat but you don't have to. I have made this one 3 inches tall but you can make them any size you need.
Here is a look at it from the side.

Thank you for joining me and have a great rest of your day.
Happy Crafting


Wednesday, November 4, 2015

Inspirational Wednesday - Trip Jar Label

Happy Hump Day! The week is half over and the weekend is so close. For me though my weekend is a bit closer my girls have no school on Friday which of course means I can sleep in a bit. Which will be very helpful it was a rough night Monday not which of course slowed down my Tuesday which has effected my Wednesday. I don't like when that happens. 
Anyways on to today's project. One of my best friends asked me to help her decorate a jar she is using to put money in to save up for a trip out to see her sister. As well as her soon to be new niece/nephew in about 9 months from now. This is what I came up with.

The paper I used is just some white card stock. I cut it down to be 1/2 an inch smaller all around then the measurements she gave me (8 x 4.5) so this measure out at 7.5" x 4". 
Then using Microsoft Word I just made a template the same size and typed out what I wanted it to say. Once I was happy with everything I just printed it out. I hand colored the letters with my copic markers. I am sorry I dont have the colors I used I put them away with out thinking and cant remember what their numbers are. I did used a purple for the top line, a blue green for the middle and yellow for the bottom.
 I then used Lawn Fawns Wish You Where Here stamp set for the States, stamped in memento tuxedo black ink as well as the x for my best friend which I stamped using memento Danbue Blue ink and the heart which is for her sister in memento grape jelly. I then took one of the stamps from Lawn Fawn Bugs and Kisses for the travel line. I liked it better die cut out then just stamping it straight on there. I then just used my 1/2 inch corner rounder to soften the edges. My friend now has something to help reminder why the money in the jar should not be touched.

Thank you all so much for joining me. I hope you have a wonderful Wednesday. 
Happy Crafting


Supplies


Monday, November 2, 2015

Cut It Out Monday - How to Download Sadness & Disgust

Happy Monday all.
I hope everyone had a good weekend. Mine could have been better but what can you do right. Oh well on to a new week and a new Cricut Project. Today's project was requested by my girls. They asked if I can make one of the characters from Inside Out. So i let them pick the ones they wanted and decided to do a How To video. This will show you where I got the file and how to upload them to the Cricut Design Space. So lets get started.

You first want to find the image that you want to cut out. Now you can just take an image off of your computer but today I am doing an .svg file. I found these images at Krafty Nook, there are a lot of great cut files on this site for free. I just typed in the search bar Inside Out and it came me all the post with that name in it. Once I got to the images I was looking for I had my girls pick out the characters they wanted. These are who they picked.
These files are easy to download as well as uploading them to Design Space. The best way for my to tell you how to do that is to show you in my video so please click on the video below to see how to download and upload.

Although Disgust turned out really cute I am not sure I would want to go to small for her thought I think you will loose some of the detail. She is 4 inches tall and as you can see on her belt that is a very small black piece. I did not even know it was there until I made her bigger. I used three different shades of green to make her, as well as some pink for her lips and scarf.
Sadness on the other hand was very easy to cut out and put together. I used three different shades of blue (all scraps as well) and black for her glasses. You could even go a step farther if you wanted and put plastic behind her glasses or fill them in with some glossy accents for the same effect. But I think she looks just as good as is. 

They have the other emotions on that site as well along with Bing-Bong. I would go and check out what other goodies this site has. I am very impressed with the files you can get there so far and I am not done looking yet.

I hope you all have a wonderful Monday and I will see you soon.
Happy Crafting


Friday, October 30, 2015

To Die For Friday - Frankenstein & Ghost Goodie Bags

Happy Friday.
I am so looking forward to the weekend. We get two no alarm days in a row. Speaking of alarms for forget to turn your clocks back on Sunday (or Saturday night before going to bed). Besides the no alarm days we are going to be busy. Saturday hubby is help his friend move the gym to their new location then we will be heading out to get a new bed. And of course we will be going Trick or Treating. Sunday is grocery shopping and laundry and both days we will be cleaning the house (I kinda neglected it the this week) as well as taking down the Halloween decorations. But should be a fun weekend.

Now on to today's project. I made these cute goodie bags using the Lawn Fawn Goodie Bag die. First I made Frankenstein. I used some green card stock for the bag. I then took the die and some black card stock and die cut out the top part of the bag for his hair. I used Spellbinders Standard Circles (a mix between the small and large dies) for his eye and I have him looking up like he is trying to see what going in the bag. I used the copic marker multi liner in the size 0.5 for his mouth. I used my zippen for the hair and eyes but red line tape for the bag. You want a strong hold for the side of the bag.
For the ghost i wanted to do something different instead of white card stock I decided to use vellum. I mean Ghost are kinda transparent so why not right. I did to passes through my die cutting machine to get all the score lines to show up well. It cut out beautifully. Once everything was folded I used red line tape to hold that bag together (you cant even tell in the picture can you). For the eyes I used the same size circles as I did for Frankenstein but the month is cut out with the smallest size oval from Spellbinders Classic Ovals Small. I now know why vellum is not used much for dies like this, It can be a bit of a pain to fold. But I do really love the way the ghost turned out. I love that you can just see what's in the bag. 
These are just so much fun and easy to put together. If there was more time I would have made a bunch of these and handed them out filled with candy. Also a great idea for any Halloween Party.
Thank you so much for joining me and I hope you all have a fun and safe Halloween. See you back here Monday.

Happy Halloween and Happy Crafting.


Wednesday, October 28, 2015

Inspirational Wednesday - Inspired by a 6 year old Halloween Card

Happy Wednesday
I want to just jump right into today's card. Monday night after the kids Jiu Jitsu class I brought my youngest home (the older one got to stay and watch the adults). After her shower and snack she asked if she could help make a card. So I let her pick out somethings out. So today's card was inspired by her.

She picked out this cute witch. It's a digital image from The Greeting Farm called Halloween Witch. Once we got the size right (she was so excited to know that she get to color the other images) she then picked out the colors, well the color palette, I picked the shades of colors in those palettes. But she pick what colors went where.
 She asked that the band on the witches with the greens. I used G09 & G07. She wanted the pumpkin to be orange so I used YR04 & YR07 with a little E29 for the stem. Her last pick was the broom and she wanted it a bright red but we compromised on a bit darker of a red, I used R37 & R39. I used N6 & N8 for her hat and shoes (although I wish I had used N10 & N8 instead) and for her dress I used V4 & V6. I used E27 & E29 for her hair and for her skin I used E50 & E53. I then took my 0.1 multi liner and darken her eyes, eyelashes and eyebrow (ever girls needs a little makeup right lol).
My youngest also picked out the pattern paper too, this paper is from We R Memory Keepers 6x6 Halloween paper pad. I cut it down to just under 4.25 x 5.5. The card base is from so Bazzail card stock called Lilac Sugar (cut to 4.25x5.5) I then just used some paper from my scraps and used Spellbinder Standard Circles (a mix of the small and large size) to cut out the circles. I then took the Trick or Treat sentiment from the Trick or Treat stamp set by Lawn Fawn. Stamped that on to the yellowy-orange circle and stuck that down with so foam dots at a slight angel. I took my ATG gun and glued down the green one flat. I use two layers of foam dots for the witch and placed her just off center on the green.
For the inside I just used some of the remaining paper and just trimmed off a bit so the card would fold flat. Leaving plenty of room to write a message.


I love having my kids get involved with some of my project and then seeing the look on their face when it is finished. Thanks so much for joining me and we will see you next time.

Happy Crafting


Supplies

Monday, October 26, 2015

Cut It Out Monday - Cricut Party Time Halloween Card

Welcome back to Cut It Out Monday. I hope everyone had a great weekend? We have a fun one, the party on Saturday was great and even though the weather was yucky out on Sunday it was still a good anniversary. We stayed home (we did plan to go get a new bed) hubby played video games while I got some much needed laundry going (I hate doing laundry lol) then even though he got called in to work for a bit we did have a lovely dinner at Benihaha's. Then we came home, he played some Pokemon with the oldest and the youngest got to play on the Wii for a bit. All in all I would say this was the best anniversary since Vegas. Today's project as well as the rest of the weeks is a Halloween project. So enjoy the Halloween fun.

Today was a make it now card. This is just one of the cards that came in the project. It also had a spiderweb card as well as one with jack-o-lanterns. This is a free project if you have the subscription. I left everything the size it was and just picked out my papers. I used mostly scraps for this. I glued everything together with a zig pen (i could not find my tombow) but you do want something that will give you a little time to place the layers in place. 
I think this would be a great birthday card or invitation to any kind of party. You could even use this to give some one tickets to see Wicked, maybe change Halloween to Fun or just remove happy and Halloween. Thanks so much for joining me and see you soon.

Happy Halloween


Friday, October 23, 2015

To Die For Friday - Happy Anniversary Card

Happy Friday guys.
Do you have big plans for this weekend? Saturday we have a party to go to and I am hoping to get my craft room clean and work on the Christmas cards for my neighbor. On Sunday we will be celebrating my 12th year of marriage. We will be doing it family style. Normally we off load the kids with a friend for the whole night and go for dinner & a movie but this year, since hubby is on call and our anniversary is on a Sunday, we decided to go to Benihana's for dinner. This brings us to today's project an anniversary card for the hubs.

I used Spellbinders Grand Labels One for the card base. I just scored about 1/2" from the top to make a fold line. I used red line tape to hold the two pieces of card stock together making this a top folding card. All the card stock is scraps from my stash. I used Spellbinders Classic Heart for the front. I took a stamp from Simon Say Stamp Inside & Out Sayings for the sentiments. Stamps this with Versafine black.
For the inside I started with the coordinating stamp for the Inside & Out sayings. Then used this Happy Anniversary stamps for Simon Say Stamp Happy stamp set. I used the same ink.
My husband is learning Japanese for his job (it was his choice to learn this) so I thought it would be fun to try my hand at writing the characters. He can write and read Japanese a little but his speaking is better. I this picture I am showing you the card with the writing on it and a screen shot of what i wrote. This says "I love you" and let me tell you writing those characters is harder then i thought it would be. I am so proud of him.

Thanks for joining me. 
Happy Crafting


Supplies


Wednesday, October 21, 2015

Inspirational Wednesday - Gift Card Holder

Happy "Back to the Future Day". 
Welcome to another Inspirational Wednesday post. I hope everyone's week is going well. I think i has improved I don't feel so brain fried today. I am looking forward to the weekend and getting my craft room rearranged as well as getting my stamps set up in my new system. Not to mention that Sunday is my anniversary which I did kinda forget about but I get one right. 

Any who on to today's project. I got in a pocket letter swap over the summer this cute stamped out image and thought this you look really cute on a card to go into a home spa type basket. This is then when I remembered I have a stamp set from the Greeting Farm called Me Time Anya (which is on sale right now on the site just click on the name for the link) and even though the images with that stamp set are to big got today's project I know that the sentiments would fit beautifully. After that everything just fell into place. Here is the image that started the whole thing. 

 I had two of these images so I made two different card holders. and I think they are just so stinkin cute. Here is a look at both. 

I used the same copic colors I just changed where I used them on the images.
For this one I used C0, C2,C3 for the tub with a little colorless blender to make it look a bit lighter around the candles. I used V17,V22,V20 for the candle base and FYR1 and FY1 for the flame. For the bubbles I used a little B000 to give them a little color but still give them a translucent look as well. For her hair I used E31 & E34 and her skin was E30 & E31. I took B00 for the top part of her cap and the filled in the flowers and band with B02. Y19 for the ducks body and a touch of FYR1 for the beak. I took some clear wink of stella and used just a touch on her eyes and the bubbles. Then i used glossy accents on those as well as the flames.  I then stamped the sentiment on the front with Memento Tuxedo Black ink.
 For the insert I cut a piece of scrap white card stock to 3" wide by about 5 1/4" (I really just eye balled it). I used some of that scrap to make the pocket measuring to be 3" wide by 1.5" tall. I use some strong tape to hold it in place putting the tape as close to the edge as possible to have plenty of room for the card to slide in.
  I use the same ink for the inside images as the front. I then just took the B00 and B02 to give the flower a two tone look and colored the center in with a little Y00. This card is just what I happen to have on hand to so you the finished look.
This one I just used the purples for the cap and the blues for the candle. 

This is just such a cute gift card holder or it could hold some money too. I love when I not only come up with something simple but when it makes me think of other stamps I might have that I have not used. Thank you for joining me. I hope you get Inspired today too.
Happy Crafting


Supplies


Monday, October 19, 2015

Cut It Out Monday - Cricut Explosion Birthday Card

Welcome to another Cut It Out Monday. How was every one's weekend? I hope you got some time to relax. The girls and I spent the weekend at a birthday party while hubby helped someone move. Then hubby helped the oldest on a school project. I know it was not much but it ended up filling our time. We also got their Halloween costumes too. 

But your here for today's project. I made this fun birthday card for my son's birthday next month. I cant believe that he is in 7th grade this year wow time sure did fly by. I found this card in the Make It Now section of the Cricut Design Space under Birthday. I love the 3D look of this card.
 For the inside (at the moment) I kept it simple with just using a stamp from Simon Says Stamp Mother's Day stamp set. I know but for me this was a fitting sentiment since we have not seen each other in 2 years.

I not only love the fact that this was an easy card to make but with just to colors of card stock it makes a big impact. Thanks for joining me and look for my next post.
Happy Crafting

Friday, October 16, 2015

To Die for Friday - Watch What You Eat Pillow Boxes

Happy Friday everyone. Do you have any big plans for the weekend? We have a birthday party Saturday and some shopping to do on Sunday. Hoping to get some things done in the craft room as well. 

Let get into today's project. These are so cute and great size the the little ones. 
 
This is the Pillow Box Die from Lawn Fawn. I used an 8.5x11 orange piece of card stock from my stash and I got two pillow boxes out of that. Once I had that boxes cut out I used the Spellbinder Pumpkin stacks die to cut out the window. I got a piece of acetate and cut it to fit inside all the folds and used some red line tape to hold it in place. I used the same tape on the flap so I could put my box together. Once everything was together I took a loot bag, that I got at the dollar store, to hold my mini candy corns. I used my bone folder to help get the bag inside and pushed into the corners better. I then just filled it up with candy. Once i had the desired amount in just pushed in the remainder of the bag and closed up the other side. I then shook it so the candy would even out.
For this one I added a small pumpkin tag to the center of the window. I used a small size in the pumpkin die set and cut it out of the pumpkin scrap that was left from making the window. This not only saved paper (and using up scraps) but i also help me to see what size pumpkin to use. I then just was the Happy Halloween stamp fro Hats Off To You by Lawn Fawn and stamped it with Memento Tuxedo Black ink. I then used the same tape and stuck it in place. 
I think these would be great idea for handing out things at a party or if you have just a few trick or treaters and you don't want to buy a ton of candy. You can use this die for gift cards as well.
Thanks so much for joining me. I hope you all have a wonderful weekend and I will see you on Monday for our Cut It Out Monday project.
Happy Crafting


Supplies


Wednesday, October 14, 2015

Inspirational Wednesday-Pinterest Inspired Candy Corn Shaker

Welcome to the first blog post for Inspirational Wednesday. 
Today project was inspired by a card that I saw on Pinterest over the weekend. I thought it was cute and I thought to myself that this would make a great shaker card. So that is just what I did. Here is a picture of that card with an attached link.

I did change up the color and size of my card. I used some Bazzill card stock for the front and used the medium size candy corn spellbinders die to make the windows. I then took so acetate for the window and just cut that down to fit just bigger the the die cut opening. I then took my Scotch 3M foam tape (which I got at office depot) and did a double layer so everything would shake around nicely. Once all that was done i used my powered tool to make the edge of that tape not sticky. I used some of the candies from Lawn Fawn stamp set Spooktacular. I then just did a quick wash of color with my copics (Y19,YR68,C0) and die cut them out. I added Doodlebug sequence in the matching colors (looking at it now it could use more sequence lol). I closed it up using candy corn pattern paper from last years Doodlebug 6x6 paper pad Ghouls & Goodies. With a bit more foam tape I stuck the purple paper on to a white card base that measures 4.25x4.25. I used one of the sentiments from the stamp set and stamped it with Versafine ink.

I not only love the way it turned out (I could have done a few more things but maybe that will happen in a Throw Back Thursday with a twist Video) and its size. I think this is a great card to make for someone that just needs a little candy and fun.

Thanks for joining me and I hope you all have a Inspiring Wednesday.
Happy Crafting


A little inspiration for you.

Monday, October 12, 2015

Cut it Out Monday - Halloween Cake Pop Wrappers

Hello all & welcome to the first Cut It Out Monday project.

I love how cute these are. You can find these in the Make It Now section under Halloween on the Cricut Design Space and is a free project if you have the subscription. These would be great for little ones that don't like the scarier part of Halloween or for school parties. You can adjust them to any size you want so you can use small treat bags or it can hold a pencil. I only made three but the project it self has 5 different wrappers Vampire, Spider, Jack-o-lantern, Skull and Frankenstein. 
 I used two different color purples for this Vampire.   
 The sticks are just some wood dowels that I had left over from a baby shower project (I used these since my dumdum was not staying in place) and you can get them just about anywhere.

They turned out so cute and cant wait to make the others. Thanks so much for joining me.
Happy Crafting

Wednesday, September 30, 2015

My plan to improve my YouTube channel and Blog posts 2015

Hello everyone and welcome back.
I wanted to share with you what i am planning to do with my YouTube channel. I have been posting videos on YouTube for 2 years and it was so much fun to find this out at the end of my anniversary month so since Sept. 2013 I have been posting videos and posting here on my blog as well. But after a lot of thing I decided to change the way i was doing things. Clearly just saying I was going to be posting a video was not enough and try to go in my craft room and come up with a card or project was not help either, I have OCD (which can sometimes take over) and I also have a tenancy to over think things so then I would stress about not having something to post and that just made things worst. I think what I have come up with will not only give me a less stressful way to get videos done but I will also be able to plan ahead with ideas instead of trying to come up with them on the spot.

I decided that I will be posting videos Monday thru Friday (leaving Saturday and Sunday to family time) every day will have a different theme. So I am just going to jump right in and explain what you all can expect from me and my channel.

Cut It Out Monday-This is going to be Cricut related stuff only. I will be share my tips and tricks with you, I will be doing some of Cricuts Make It Now projects, cards, and showing you have some of the images get put together.

Tuesday Talks-This is going to be where I just post a video there will be no blog on these days. I will have all kinds of topics like Product Reviews (at the moment just off of things I already own), small hauls (I may still do the bigger hauls, I am trying to be good about not buying anything, but those depending on the size might be its own video, recap/update really just talking about what happened last week and what to expect (maybe even seek peeks) of what is coming up that week). I might even share some planner related items as well as My Life (the ups and downs).

Inspiration Wednesdays-I plan to create things off of things that inspire me weather it is from Pinterest, something I see while I am out and about, color combos or something I saw on a different channel. Credit will always be given as long as I know where this inspiration came from.

Throw Back Thursday with a Twist-I have a few projects that I have done but did not end up on camera and I would love to recreate them ans share them with you. Sometimes I will just add a link with the video talking about an older video if it is not something I can recreate. I would love to try and revamp an old project too. Now I'm sure your wondering what the twist is well that is you my subscribers I would love to hear your ideas on what you would like to see weather it is something you saw on my Facebook page (like a picture) or something you have seen some where and would like to see me make it.This will be a no blog day to but I will list the link to the blog (if there is one) to any of the projects I have already done.

To Die for Friday-I plan on making these videos where the made thing I use are dies. This dose not count dies that have matching stamp sets. Those may still be used but the coloring may already be done so you will be just see the card or project being put together. This can mean that I use a big spellbinders die to make the card base or just have a lot of layers.

So that's it. This is what I am hoping will get more videos up with less stress I mean my craft room is one of my happy places so it does no good for me to be stressed out trying to create right. Thank you all so much for hanging in there with me and I hope you all have a wonderful evening. Oh one more thing you can now also follow me on Instagram @winterwing82

Happy Crafting


Monday, August 31, 2015

Large Haul and Giveaway

Hi  guys I am back with a haul video this time. So I finally got a chance to share with you all the goodies I got over the last 3 months. And let me tell you it was a lot (although the video was shorter then I thought it as going to be). Here is a look at the box i had most of the stuff in.
 This one just shows the rest of my copic markers and the way they are all stored.

I was so floored to see earlier this month that I had 280 subscribers as of posting this i have 293 subscribers. I am truly happy to know that my crafts can inspire others. Now to jusat out more carft videos up right lol. OK so on to this giveaway. I wanted to thank you all for hanging in there and to welcome my new subbies with a giveaway. There will be 2 winners for this giveaway and you will have 3 chances to enter. It's open to the U.S. Only (sorry guys shipping international is just to much for the budget to handle right now). The giveaway will end Sunday Sept 13 and I will draw the winners Monday Sept. 14
Here is how to enter.
1- Be a subscriber on my Youtube Channel and leave me a comment on this video
2- Follow me on Facebook and leave a comment on the post to this blog.
3- Be a subscriber to my Blog and leave me a comment on this post.

So that is the 3 ways you can enter. You can do all 3, just 1, or 2 that is up to you. Good luck to everyone I will post a video of the winner Monday Sept 14.
Here are the prizes
Winner one 
Winner 2

Happy Crafting