Monday, February 29, 2016

Cut It Out Monday - Bunny Envelopes

     Wow what a weekend in my house. Friday our oldest went to her sleepover and then they both had Jiu Jitsu on Saturday where our youngest got another strip on her belt. Then we went out and got the girls shoes and my husband a shirt for their upcoming Father Daughter Dance next week.  We also checked out the new Walmart Market Place near us and broke down and bought a few girls scout cookies. Sunday hubby had to work and the oldest was sick so not much got done but it also wasn't a relaxing day like I was hoping for. 

     Anywho on to today's project. I used this make it now project to start off my Easter series. They turned out so cute and I think my girls will love them. So simple to make and easy to embellish if you so choose too. 


     Each one is about the same just different colors for the ears and noses. The project says to use a pompom but since I didn't have any on hand I just made a nose. everything was cut out and glued together (I just used Tombow Mono) I added a little Wink of Stella for the ears.
     I added a bit more then it shows in the first picture it just didn't have enough sparkle for me. I used Dark Pink for this bunny and added a bit of Clear Wink of Stella to the eyes just for a little something extra as well as some on the nose.

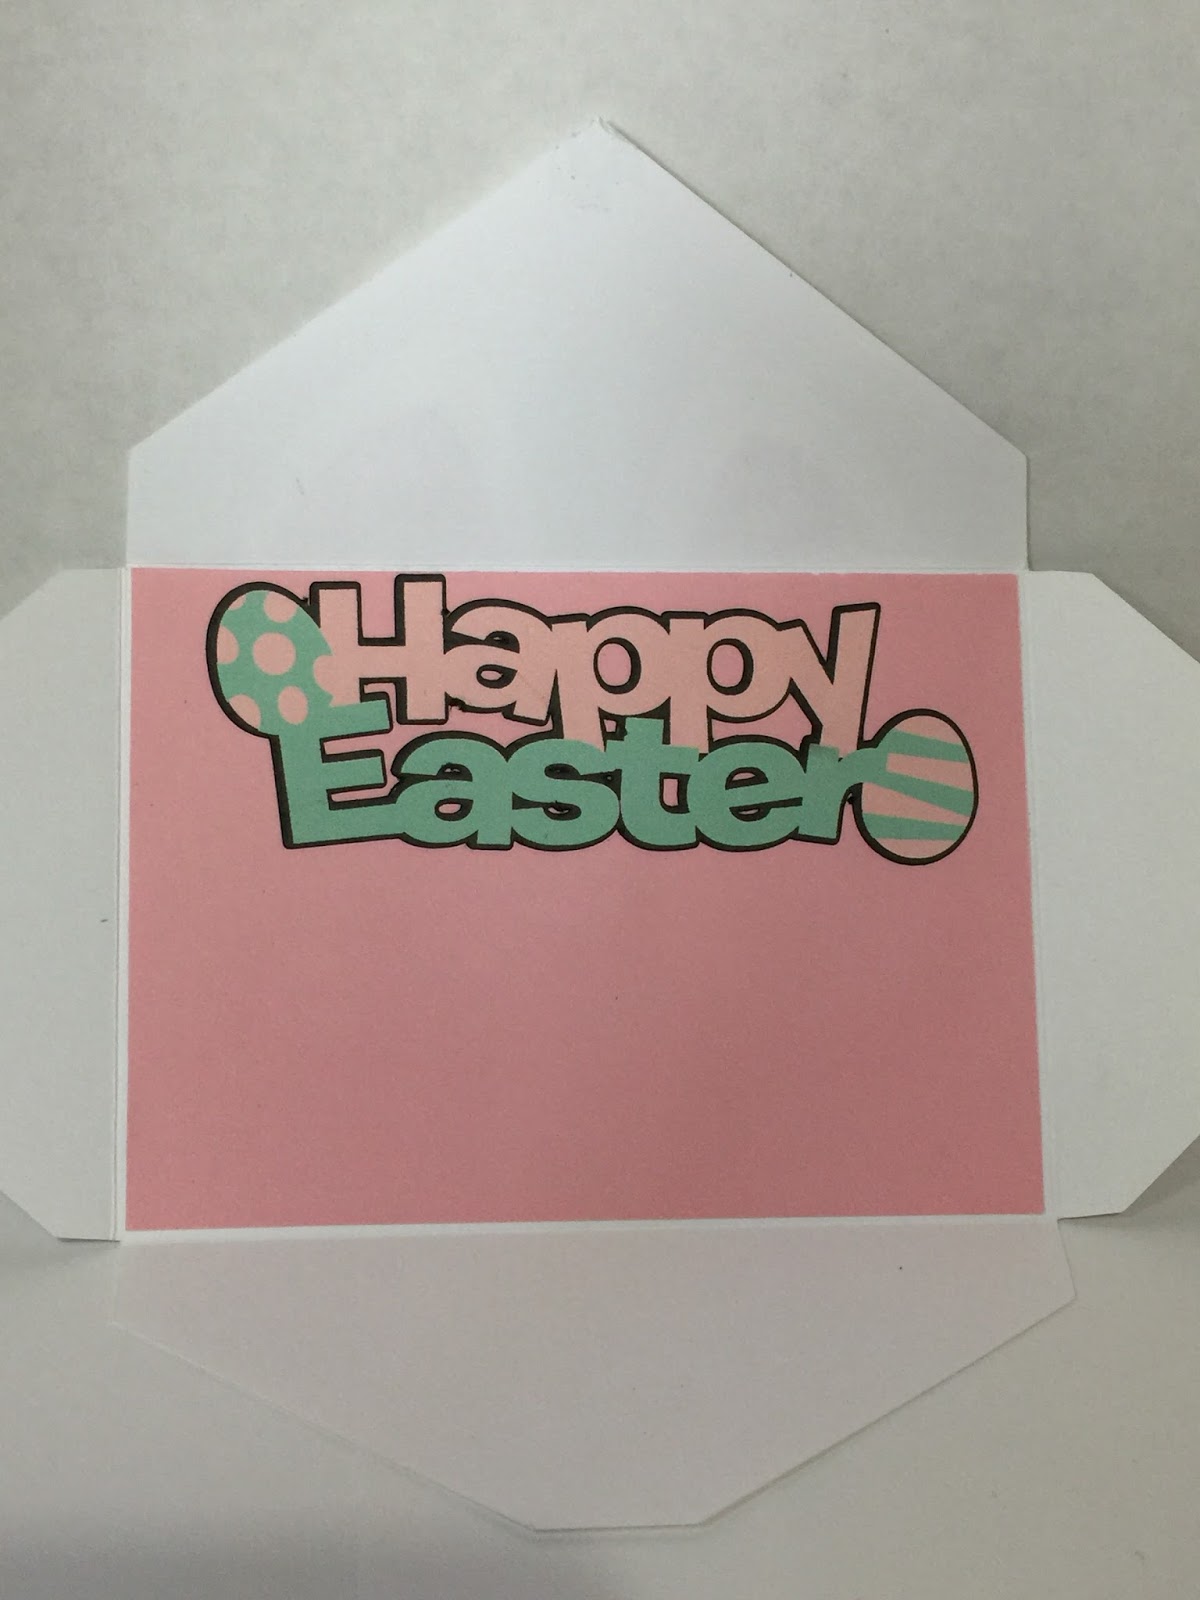
     For the inside I glued down the insert and I not sure what I will be closing this with but I like that it will just open. It's something different right.

     This one I just used a darker cardstock. Again I used Tombow Mono to glue it all in place and followed that with some Wink of Stella.

     For this bunny I used Pink Wink of Stella (but to me this one seems more like Dark Pink and the other one Pink) and some clear for the eyes.

     I also changed the color of the inside piece and lowered the sentiment. Again still not sure what to use to close it but I have time to figure it out right.

     Thank you so much for joining me and I can't wait to get the other ideas I have for my Easter series there are just so many. I hope you all have a great Monday.

Happy Crafting

Friday, February 26, 2016

To Die for Friday - Thinking of You Rainbow Card

     Happy Friday all. This was such a fun card and I cant stop looking at it. It was a little stress full getting everything die cut out and lined up so my OCD was happy lol. But it turned out really pretty and I am hoping that my friend will like it. The only super frustrating part was to finish the card and go to turn off my camera and see that i was not even recording. I don't know if I turned off the recording thinking i had turned it on or what happened. But the card turned out amazing and that s all I can really ask for right.


     I used the Thinking of You die from Lawn Fawn and die cut it using scraps of cardstock. I wanted a rainbow look so I cut them out twice for each color. I wanted a wrap around look so I started with the front tale of the red and just laid them down so it looked like it was wrapped around anf I used ranger Multi Medium Matte to glue everything down. When it came to the colors that were not long enough I just trimmed some of the tales so they look like they go together.  


     For the blue I wanted that to stand out more (since that is my friends favorite color) so I just die cut 4 more out of white cardstock and used my Ranger Multi Medium Matte to glue them all together layering the blue on top. It gives it just a little height. I then used some blue rhinestones to dot the i's which gives it a little bling and no dealing with all the tiny little dots. I then just trimmed off all the over hang.

     For the inside I just stamped this sentiment from Simon Says Stamp Flowers on my Mind stamp set. I used Versafine Onyx Black ink. That finished off my card. I think it turned out really nice and cant wait for my friend to get it in the mail. 

     Thank you all for joining me. I will have a new video on Monday. I will also have a haul video and an update video coming soon as well. I hope you all have a great rest of your Friday and a wonderful weekend.

Happy Crafting


Supplies

Monday, February 22, 2016

Cut It Out Monday - Happy Belated Birthday Card

    Welcome back to another Monday. Did you have a good weekend? Mine was great. Hubby and I had a date night and went to see Deadpool on Friday. Saturday I stepped out of my comfort zone and got my hair colored purple. I did an ombre affect with it (well the hair stylist did my hair) and I just love it. Then Sunday we just had a lazy day. Kids made fort and stayed in their jammies all day (that does not happen often), hubby had to go into work for a bit and I just did a little crafting and laundry. 

    Anyways onto today's project, I was playing around on the Cricut Design Space app looking at all my cartridges and their images when I came across Dory. I thought that would be a great image to put together but for what. So with that in the back of my mind I continued to look. Then I thought she would make a great birthday card or even better a great belated birthday card. So that's what I came up with. I can't tell you how great this card is.
    Let's talk about Dory for a minute before getting to the rest of the card. I used a lot of scraps to cut her out. She is just over 2.5 inches wide by almost 3 inches tall. I used tombow mono multi to put her together, which is one of my favorite glues to use for something like this because of the wiggle room. I also cut out some waves using the same colors for just a little something and now it looks like she is jumping out of the water.

    As I was cutting out Dory and the waves I went looking to see if I had a fishy belated birthday type sentiment and I found the "Just Keep Swimming..." stamp from AmyR's Underwater Sentiments and knew that this card was meant to happen. I used my stamp-a-ma-jig so I could position straight and just where I wanted. I used Versafine Onyx Black Ink and stamped it twice. I had thought more about it I would have added a few music notes. I then glued down the waves at the bottom and trimmed off the over hang and the attached Dory. I glued down the panel to my dark blue card base which is a side fold A2 size card. 

For the inside of my card I had cut out another Dory and waves. I had add the writing to the white panel using the Cricut. I used Cake Base Font and a black pen. I again used my tombow to attach everything to the card stock and then to my card base. 

I just love this card I even shared it with my husband and he thought it was a fun idea for a card. Not only did it come together nicely but it also turned out really cute. This has made me thing of so many more fun card ideas for the many Disney/Pixar characters and all the other images that Cricut has. 

Thank you guys so much for joining me and I hope you all have a great rest of your day and a wonderful week.

Happy Crafting


Supplies

Friday, February 19, 2016

To Die for Friday - Oval Birthday Card

Happy Friday all. I first want to start off with a big WOW this will make my 100th blog post. I cant believe I have made that many post. Anyways on to the post and card at hand. My youngest has a birthday party to go to today and I thought it would be fun to make her a card to give to her friend (that and we wont have time to get her a card). This turned out so cute I may just make another one to keep for myself lol. 


I started out with a white card base and used the largest Stitched Oval Die from Lawn Fawn to make a shape card. I just off set at the top to keep the fold and then I ran that through my Grand Calibur. I used some pattern paper from My Sweet Matpack for the background. A fun note I had colored the images in the night before and did not know that I was going to pick so it was nice to find this that had most of the colors I used in it. I just used my ATG to stick that in place.


The hippo, birdie, balloon, and hat are from Lawn Fawn Year Four. I stamped them on some copic quality paper using Memento Tuxedo Black ink. For the Hippo I used N0, N2, and N3, for the bird i used Y02, Y04 and a little YR04 for the beak. For the balloon I used RV02 and RV04 I then used a little clear Wink of Stella glitter pen and some glossy accents. For the hat I used BG02 and BG05 and also added a bit of clear Wink of Stella. I add a little of that to their eyes as well. Once everything was dry I used the matching dies and cut them out.


For the focal panel I used some paper I had sitting at my desk. I had been playing with the Mermaid Lagoon Distress ink and water colored the paper. I used the third largest oval to die cut that out. I used a lot of foam tape to hold it in place and stuck it down.  I then cut a scrap of green card with the same oval die and then used one of the Stitched Hillside Border die. I took the sentiment for the same stamp set and used Versafine Onyx Black Ink. I used my ATG to tape that in place. I used a little Tombow for the hippo and glued him down with his back legs behind the hill so it looks like he is coming over the hill or running down it. I used Tombow to glue down the bird and the hat. I used a small foam circle behind the balloon so it can look like it is floating off the panel.
I left the inside blank so she can write what ever she wanted to her friend. She has not seen it yet but I hoping she likes it.

Thank you all so much for joining me and I hope you all have a great Friday and a wonderful weekend. Wow still can't believe this is my 100th post.

Happy Crafting


Supplies


Wednesday, February 17, 2016

What What Wednesday - First Haul for 2016

Its Wednesday already what happened to the week? 

I had a busy weekend and didn't know what I was going to do for today's video. I have had this stuff sitting out waiting to get put away but I wanted to share with you all the great goodies I got. I did a little online shopping with Simon Says Stamp but only picked up a few things. 

A good friend of ours sent us gifts for Christmas and my birthday. He gave me a couple of gift cards t Michaels. So I went to the bigger one of the two near me. I always check the clearance section and I hit (in my opinion) the jackpot. I found a one of the big Copic Airbrush Kits. I have been wanting one of these for a long time but could not justify paying $180 or more for it. But after using the small one and loving it I was so happy to find the big one it was on sale for $70. I also found in the clearance section a 180 size can for $13 normally $27 and the 60 size can for $9 normally $19.


My last stop that same day I went to Craft Warehouse. I picked up a few things there. The Lawn Fawn stamps and dies where on sale and the paper pad was on clearance. I did pick up a second precision tip bottle which turned out to be the same one I ordered from Simon just didn't know that until the order came it.

I am hoping to get my hands on some of the new Lawn Fawn stamps and dies here very soon so I might have another haul video coming sharing those goodies. I am also going to be planning a giveaway for all you wonderful people following me here, on my Facebook page, Instagram, Twitter/Periscope and YouTube. Thank you all so much for you comments and support it means so much. Have a great rest of your day.


Happy Crafting


Monday, February 15, 2016

Cut it out Monday - Using Cricut Ipad App

Hello everyone.
Today I want to share with you the app for the Cricut Design Space. Now I don't go into a lot of detail about everything because there is a lot to go over so I just talk a little bit about what I am using in the app. I am happy to share more about the app just didn't want to try and do all that in one video. I tried it that way and it would be a very long video. 

I just show how to use some of the features and how well the app links up with the machine. I have the Explorer and mine did not come with Bluetooth. So I used the Bluetooth adapter that I won a while back. So if your does not have Bluetooth built in you will need one of these.

I just cut out a simple image. I really just wanted to share how well it can connect and that the cut is still the same.


Thank you for joining me and I hope you all had a wonderful weekend and a great rest of your day.
Happy Crafting


Friday, February 12, 2016

To Die For Friday - Valentine #7 - Milk Carton Treat Box

Hello Friday and the 3 day weekend.
How was your week? Do you have big plans for the 3 day weekend? Are you getting a 3 day weekend? I am looking forward to having 2 days of doing nothing and getting the chance to sleep in a bit. We are thinking of going to the movies but my parents are thinking of coming for a visit to so not sure what is going to happen but still looking forward to the weekend.
Anyways on to today's project. This is the 7th Valentine in my mini series as well as the last one. This project was a hand full I seemed to have had a hard time getting things to go right. But it turned out really cute and I am very happy with the end product.

I used Lawn Fawn's Sweet Smiles stamp set and stamped out the gumball machine along with one extra gumball. I also used some of the faces and stamped everything with Memento Black Ink. I then used my copic markers to color the image in. I used RV17 and RV19  to color in the base and top of the gumball machine and C1 and C2 for the rest. I used a little Silver Wink of Stella for the turn handle. For the gumballs I used R14, R17, RV13, RV14, V15 and V17. I then used the matching dies and cut everything out.

I used the Milk Carton die from Lawn Fawn. I cut that out twice and made this cute little carton. I used some score tape to hold the sides together. I used the sentiment stamp from the Sweet Smiles and stamped that in Memento ink. I also created a window (you don't see it in any of the pictures) but I did take into consideration where I out the window and where the carton gets put together. So I changed where I was planning on placing the machine and just covered the window with it. I used some glossy accents to glue it to hold it in place over the acetate.

I filled the carton with some gumballs that I found a Target. You can used individual wrapped gumballs or add them into a bag, I didn't do that since I was not going to be eating them. You can also add anything small in here and would be a great way to give a little treat. 

Thank you guys for going me and I hope you all have a great weekend.

Happy Valentine's Day and Happy Crafting


Supplies


Wednesday, February 10, 2016

What What Wednesday - Valentine #6 - I Adore You Card

Welcome to another wonderful Wednesday guys. 
I hope your week has gone well thus far? We have had some really nice warm weather the last two days. I want to jump right in to today's card. I have been wanting to use this image for sometime not and thought why not today. 

This is a digital image from The Greeting Farm called Anya Valentine. Aren't they just the cutest? I decided to use my Prismacolor Color Pencil and Gamsal to color them in. I used Peach (PC939) for their skin and a bit of Crimson Red (PC924) on her cheeks. Once that was blended I decided I wanted them to match a bit so I used True Blue (PC903) on both their shirts and Carribean Sea (PC1103) for her skirt which I faded out to white and his pants for a denim look. I wanted him to have a black jacket but not new black so I used 90% Warm Gray (PC1050) which i think give it a nice weathered look. I also used that same color for both their shoes. I used Sand (PC940) for her hair and Chocolate (PC1082) for his giving him a nice dirty blonde like color. For her hair bow and the heart I used Crimson Red. Once everything was colored I used the scan n cut machine to cut them out with a 0.08 inch border.

I took a piece of scrap blue cardstock and trimmed it to size and gave it a flag end. I then stamped out the sentiment from Amy R's Adore You sentiments with Memento Love Bug Ink.

I attached my front panel it to my pattern paper from Doodlebugs 6x6 Sweetheart paper pad. I add some red ribbon form my stash and tied a bow.

I add a few Doodlebug Love Sprinkles in the corner to fill in the empty space a bit. I dint want to take away from the paper or my image. I then glued down my image.

 Before attaching the front panel I wanted to finish off the inside. I used this sentiment from the same stamp set and stamped it using Versafine Black ink. I then trimmed down a strip of the same paper I used for the front and placed it on the bottom. Once that was dry I then attached the panel to my card base using some Tombow glue. That finished off my card for today.

Thank you so much for joining me. I hope you all have a wonderful day. 

Happy Crafting


Supplies

Monday, February 8, 2016

Cut It Out Monday - Valentine #5 - King of Hearts Card

Good Monday all.
How was your weekend? Did you watch the Super Bowl? I really only watched the half time show, I am not much for Football and none of our teams made it. So while hubby was watching it I was crafting. I started on today's card and has going to film it and thought that this one would be just assembling the card. Which was a good thing it took me the entire football game (except when I took a brake to watch the half time show) to cut this out. I had such a problem getting his face cut out right. I don't know if it was the paper, the level I had it set to cut at or just his face but it took several attempts to cut out. This card turned out great even though I had to walk away and come back to it.

I saw on pinterest some time ago a card or scrapbook layout where they used the Queen of Hearts. This is when I thought she would make a great Valentine's Day card. so as I was trying to decide on the image to use I saw the King and thought I would make him the prominent image on my card. No one really uses the King. He measures out to be 2.5 x 3.7. Like i said before I had a hard time getting his face to cut out but once I was able to get it cut out of white cardstock I used my E11 copic marker to color it in. I used Tombow to glue everything in place starting with the larger pieces first. 

For the front panel I just cut out a square of red cardstock to 5.2 x 4 and used Simple Celebrations for the font. I glued the King to the panel then taped the panel on to my A2 top folding card base.

For the inside I used the same size panel and used Thoughts & Phrases - Brush Script font for this. I moved the letter closer together so they became attached. I then used the print and cut feature to cut out the Queen to complete the inside sentiment "queen" Of Hearts. Then just attached her to the panel and the glued that to the inside of the card.

I really to love how this card turned out. I think its just a fun card and a little different. This not only had me using some new fonts and the print n cut feature but it also has me cutting out characters that i might not always thing to cut out and use.

Thanks so much for joining me and I hope you all have a great day.

Happy Crafting 

Friday, February 5, 2016

To Die For Friday - Valentine #4 - "My Heart's all a Flutter" Card

Hello everyone and welcome to another To Die For Friday post.

I want to just jump right into today's card. The inspiration for this card I found a while back. I can't find the website or the person's blog that I saw this on to give the credit to but the idea behind this card was from that. I did change it up and will explain what I changed as I go. 
I used MFT's Flying Butterfly die on some white cardstock and the die cut it again with some red and pink cardstock from the scrap bin. I used some printer paper behind the white paper so I could glue the butterflies down.  I then cut down some pattern paper from the Doodlebug 6x6  Love Bugs paper pad to be the same width as the butterfly die cut. I used the second to smallest heart from spellbinders Classic Hearts die to make the windows, the card I saw used circles. I then lined them up and marked the butterflies that will be showing through the hearts.  I just used some Tombow and filled in with the pink and red butterflies as well as some of the white ones. I used some foam tape to give just a bit of height.
I used the largest Stitched Rectangle from Lawn Fawn for the front of my card. I took some pink ribbon from ribbon bin and wrapped that around and taped it in the back to hold it in place. I then just made a small bow and used some glue dots to hold it in place. I used Jesse's ABC's from Lawn Fawn and made my own sentiment. I lined everything up on my block and then stamped it using Versafine Black ink. Then glued the panel the the front of my card base which is a top folding A2 size card. I then glued the heart/butterfly panel down. I had trimmed that so it would sit just inside the stitched lines.
For the inside I die cut another stitched rectangle (the largest one does fit inside with out having to trim) and then add some of the remaining butterflies going across the bottom and up the left side. This leaves room for a sentiment or love note.

Like I said I would love to give the credit for the inspiration behind this card but i cant seem to find the post. Thank you so much for joining me for today's post. I hope you all have a wonderful weekend and I will see you on Monday.

Happy Crafting


Supplies


Wednesday, February 3, 2016

What What Wednesday - Valentine #3 - Distress Watercolor Stinkin Cute Card

Today is Wednesday and you know what that means. We are half way through the week with only two more days til the weekend and is time for another What What Wednesday post. I was sitting in my room thinking about what I wanted to make knowing it would be a card. And as I looked around I thought to myself "when was the last time I used my Distress Markers?". I could not come up with an answer so I figured it had been a year or more. So I thought about water coloring and I know what stamp set I wanted to use. Since it had been so long I know a simple image was jsut the thing and I have been wanting to color the little skunk from Lawn Fawn's Stinkin' Cute stamp set since I got it.
I used some watercolor paper I had on hand and stamped out the skunk and the hearts with Versafine Onyx Black ink and the added some clear embossing powder from Simon Says Stamp and heat set that with my heat tool. Once that what cooled off I took my Black Soot Distress Marker and the Picket Fence (white) and put them on an acrylic block. I used a small paint brush and mixed a little of the white and black together so I could have some grey with out really watering down the black. I used some of the grey for his white parts to give him a little shading. I then colored the rest of him in and added a bit more black to the mix to give him a lighter black color (the grey was to light but I didn't what black black). I used a little Spun Sugar for his ears cheek and on the hearts.

I set them aside to dry and worked on my card base. I knew I didn't was a big card and I had some of this great paper in my stash. The card size is 4 3/8 tall x 3 1/4 wide. I then just took some scrap green paper and hand cut out a hill for the little guy to sit on. I then stamped out the sentiment using versafine ink and heat embossing that. Once he was dry I used the matching dies and cut them out. This also helped to flatten him from the wet paper as well as the heat embossing. I used some tombow to glue the heart on to him so now it looks like he is holding it (so cute), I then placed the hill all my card base to see where I wanted it and then just glued it down and trimmed off the over hang. I glued the little guy down and that is the front of the card.
I didn't really know what I want to do for the inside so I just add the other two hearts I colored and cut out leaving room for a lovely note. I then used my 3/8 corner rounder to soften the card up and added some glossy accents to the heart.

I am so glad I used my Distress Markers for him. He just looks so well Stinkin' Cute. Thank you for joining my and I hope the rest of your week is a breeze.

Happy Crafting


Supplies

Monday, February 1, 2016

Cut it out Monday - Valentine #2 - Valentine's Mailbox

Hello everybody.
So first things first there are only 13 more days left to shop Valentine's day. Weather your shopping for that special someone or for yourself (because you know you always give yourself the best gifts lol) you don't have a lot of time left. 
Alright now that that's over with on to today's project. I love being able to do something fun for my family on V-day and a couple of years ago I found some really cute metal mailboxes and knew that those would be perfect. Every year (well this was started after our youngest turned 3 which is when I found that mailboxes) I fix dinner and have the table all set then I place their mailboxes (filled) in front of where they sit. We have a lovely dinner and after the kids, as well as hubby, get to open their mail. The kids love it, I think hubby does too. But I have notice as they get bigger (or into things that come bigger) things don't always fit in their mailbox. So this year I thought I would make bigger ones using my Cricut Explorer. Now I will say I should have done a test run to see how big they would be but I didn't think about that I was just to excited to make them and it turned out so cute. 
I used 12x12 red card stock with a piece of pink scrap for the heart. The mailbox is from the Tags Bags Boxes and More 2 cartridge and there is the once piece image (which is what I used here) and one that has the mailbox in two piece (which is what I should have used lol). For the heart all I did was slice in into the flag and the add the pink before gluing it together. I also used strong tape to hold everything together.
 I do think how ever that this would be a great size mailbox for a class room. The kids can put their Valentine cards inside or a small sucker (about the size of a dum dum)/piece of candy. These would also be great to give to neighbor kids or any neighbor for that matter. I can see putting some home made goodies in this to give to our neighbors. 
I now know for next time to either make one to see how big it will be once assembled or go for the two piece one. Thank you all for joining my second project in my Valentine Mini Series. See you soon with another project and have a great day.

Happy Crafting.