Crafting keeps me Sane in a world of insanity.
I make all kinds of things from party stuff (decorations, invitations, diaper cakes, etc) as well as cards. I also do a bit of scrapbooking. Here you will find videos of the projects I have made.
Hello everyone. So I am just going to share with you the last of my items that I have gotten over the last couple of weeks as well as some Happy Mail the I received. Thank You So Much Sharon C. & Ashley Rankin Troop.
I also want to say thank you to everyone that has been following along with me these passed 4 months. I know that's not a long time but it really does feel like a long time ago. It has meant so much to me. I just love getting your comments they always brighten up my day. So thank you all. I hope you have a wonderful weekend.
I am just going to jump right in to this card. I don't know about you but with Christmas just a week away I still have presents to wrap. So here we go sit back and enjoy.
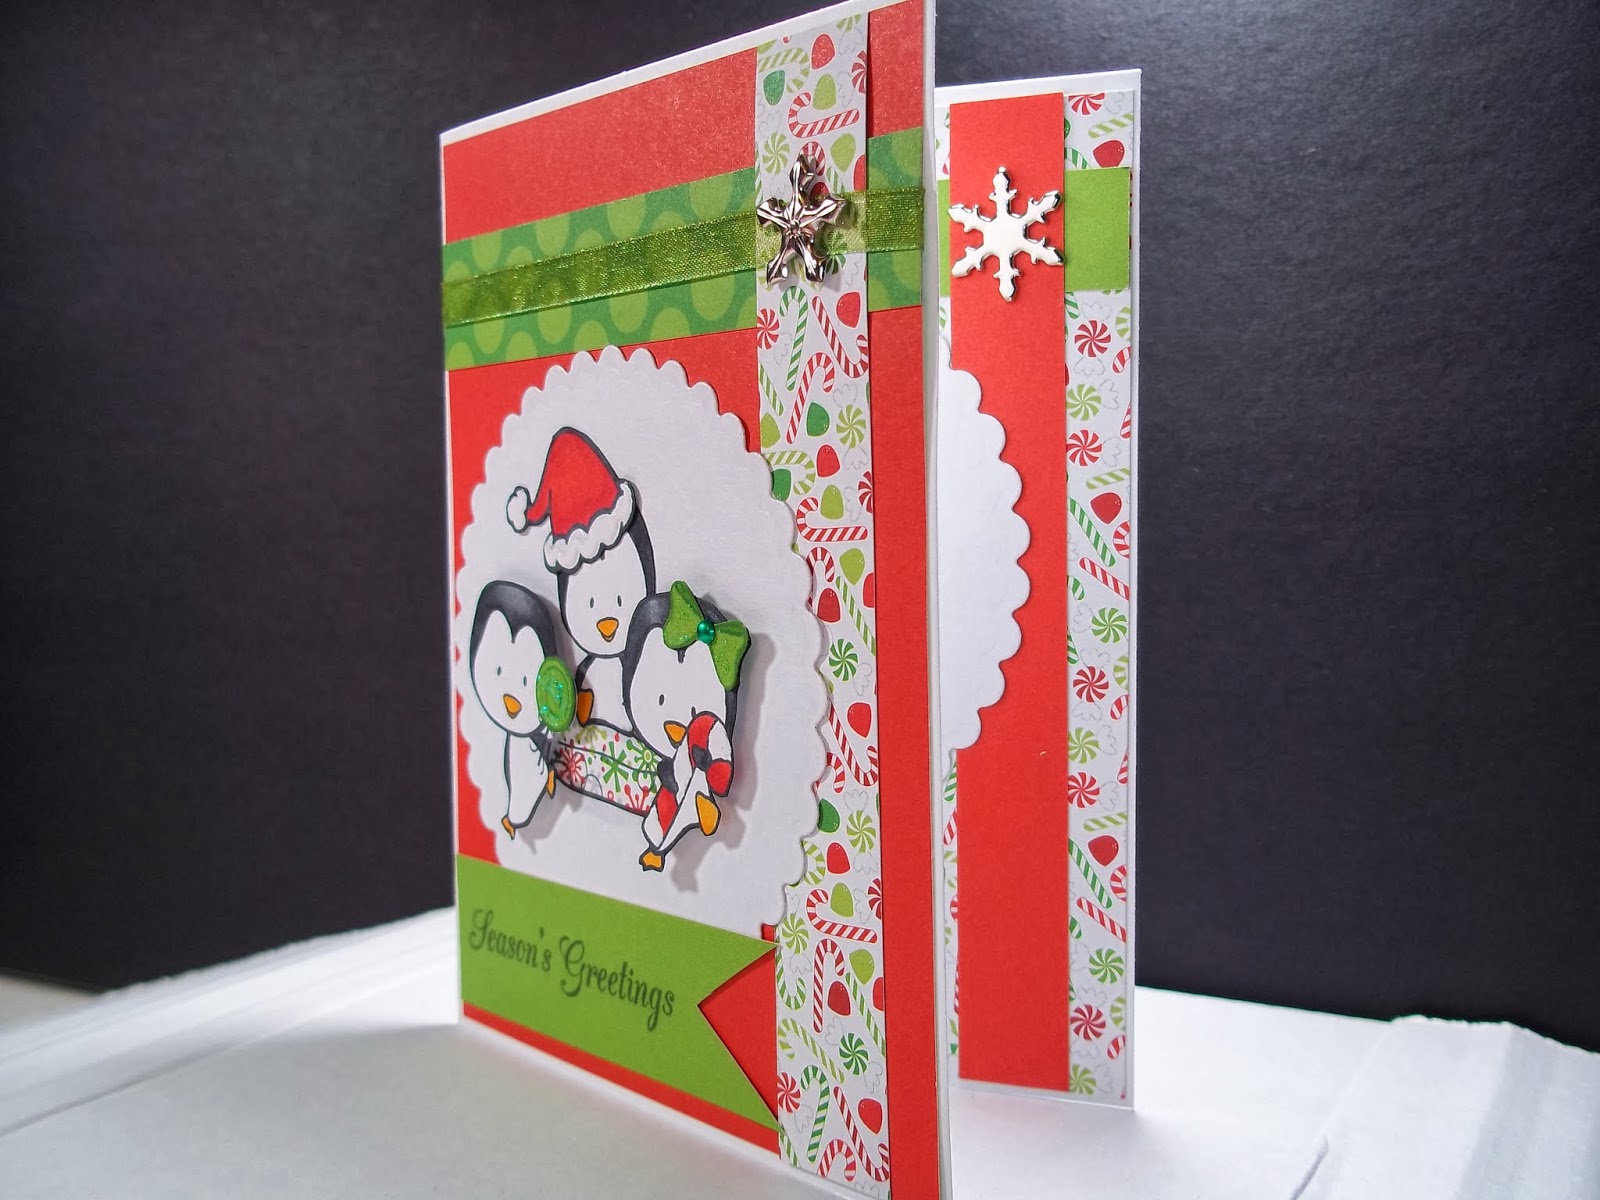
I am using these cute stamps from C.C. Designs Sweet Penguins. I stamped them on to some copic paper with Memento Tuxedo Black Ink. I colored them in using N4, N6, N8 for the bodies, YR 15 & Y38 for the feet and mouths. For the lollypop and hair bow I used Memento Cottage Ivy ink and stamped them on to some green paper then just cut them out and glued them on. I used a small green brad for her bow then just some Firefly Stickles on both. The hat is from Lawn Fawn Hats off to You stamp set & I colored it with R25 & R29 then used some Enamel Accents White , I did the same to the candy cane. I wanted him to be sitting on something so I used the pillow from The Greeting Farms Sitting Cute, stamped it with memento tuxedo black ink on to some Doodlebug Home for the Holidays 6x6 pattern paper then just cut it out. After I cut them out I used Spellbinder Petite Scalloped Circle Large to cut out the circle and then used foam dots on two of the penguins. I used the same green paper and stamped the Season's Greetings sentiment from Amy R's Christmas Sentiments II with black ink. All the pattern paper you see is from the Doodlebug Home For The Holidays 6x6 Paper Pad.
I then used some green ribbon from my stash as well as a snowflake brad to finish off the front.
For the inside I used the same size die for a space to write something. I used the other snowflake brad that I had (I could not decide on which one to use) and used what was left over from the front paper.
For the sentiment I used one from Amy R's Happy Christmas stamp set & I just used a scrap of red, stamped it with black ink. then I took some clear gems and attached them after is rounder the corners.
Attached everything to my white card base and that finished it off.
I hope you enjoyed making this card with me. I really like these guys as soon as I saw them I knew I had to get them.
There is just one more card in my Christmas Card Series and only 4 more days until Christmas. I had so much fun making these and I am so great full that you followed along.
Hello everyone. Don't know about you but I think my Christmas shopping is done (with the exception of some stocking stuffers). I just have to get everything wrapped and hidden again for the kids and husband. This year went very smoothly in the way of shopping my husband did most of it for the kids. I just picked up a few things that I saw for them which is now very hard to do since my youngest (she is 4) can't keep a secret.
Any who lets more on to the next card in my Christmas card series. I knew on this card I didn't want to use a stamped image but was not sure what to use, do I use my Cricut or just a card with only a sentiment on it. Then while I was watching cartoons with my youngest the showed a overhead view of a snowman and thought that's it I know what I am going to do. This is what it turned out like and I just love it.
I started with a black card base (I really wanted the other colors to pop). I used some Blue Snowflakes paper from Hot off the Press for the front. I then took my Standard Circles Large Dies from Spellbinder and just started with the biggest one then skipped to the third largest then the second smallest of the dies. I used some white shiny scrap card stock for the body and for the mouth I just used my smallest circle punch and punched out the circle then punched that circle to get the grin. I did have to cheat for his arms (I could not seem to draw them at all). I found a snowman online with the arms I liked the printed that out and cut and traced to get these. I happen to have some small black dots sitting on my table from a punch and I free handed the nose.
For the inside I used my Martha Stewart Snowflake deep edge trim punch to give it a nice boarder. I also used the circle die on plan white cardstock then just used some left over blue snowflake paper down the middle and stamped the sentiment on it use graphite black ink and heat embossing it.
That's it. I think this is just a fun card that even my kids would have loved to help make.
I wanted to make this a simple card. I have this stamp set that I got with one of my magazine subscriptions and thought a photo would make a great Christmas card. I waited until the next morning to take these picture so you could really see the detail.
I used craft cardstock that I got a Walmart as my base and used my snowflake embossing folder. I then took Brilliance Moonlight White Ink and wiped it over the embossing so you could really see the snowflakes.
I used so white scrap cardstock and first stamped the lady in Memento Black ink and then stamped her again on to some masking paper so I could use my Distress inks for the background (Tattered Rose on top and Tea Dye on the bottom). I took the mask off and colored her face (E00, E02) and hair (E15, E19) with my copic markers. I then added a small strip of white where the to colors meet to give it a baseboard look. I then paper pieced on her cloths with red and green cardstock (I used Brilliance rocket red to stamp out her shirt and belt and Brilliance pearl thyme for her skirt).
I used the same paper and ink for the tree. I had some pre cut stars that fit I just colored them yellow and then used some clear rhinestone stickers on the tree. The star on top is from the Doodlebug Halloween Parade collection. I then just used son white pearls for her earring and necklace. I took my silver Wink of Stella pen and used in on the ornament and a little on her shirt and belt. I used my Lawn fawn Say Cheese die to cut out the photo and the just glued my image to the back. I used balck ink for the sentiment as well which is from the same stamp set.
After everything was dry I used foam dot to attach the picture to the card and then just used to silver and white ribbon on the edge.
I left the inside blank and I also did not cover up the embossing on the inside I thought it looks really cool.
That's it. Just a fun card using stuff I have never tried before and I love the way it turned out.
Thanks for joining me remember you can subscribe to my blog as well as like me on Facebook. You can also follow me on Pinterest (I am still working on it).
So I was going to wait to do this haul after my stuff from simonsaysstamp.com came in but I did not realize that one of the items I order was a reserve so my order is on hold until they get that in. I figured that I would go ahead and share with you everything I got over black Friday weekend be I used any of it on a card.
I wanted to check out a new Joann's and thought I might even be able to get a little Christmas shopping done with out the kids but my van had other plans. So after I went to the dealers to get my van looked at it was left behind to hopefully find/ fix the problem (they had it for a week and nothing) my husband picked me up and went with me (which means I was the only one that got stuff which is ok by me :) ) The store still had that new store smell and after finding the craft section which was like 2 long rows I just picked up a couple of things.
We then went to T.J. Max which is just a couple of store down from Joann's and I found some goodies there as well.
I did the black Friday deal that Paper Smooches had which was I think a 20% off your total purchase. I picked up a few dies, a couple of stamps and 2 kits.
I hope you are enjoying the cards so far. I will have 4 more going up before Christmas and then a new years card before the year is done. Stay safe and warm out there.
Hello everyone. I hope you are staying warm. It has been a record cold here in the state of Oregon. I find that I spend more time wrapped in blankets then I do getting anything else done around the house. I know think warm thought rights well I not sure my thoughts will thaw enough to help lol.
Let's go ahead and jump right in to this fun card. I am using a digi image from C.C. Designs. I really like the Mashi's Muffins and just wish I could still get them in rubber. When I saw this image I knew just want kind of card I was going to make with her and it turned out just like I wanted. This is Tangled Tori & I printed her out on the some copic cardstock. I used E000, E00, E02, R20 for her skin and cheeks & RV21 for her lips, I did not blend out the R20 I wanted her to look a little flustered. For her hair I used E35, E37,E39 and for her eyes I used B00 & B02 with just a tiny bit of Wink of Stella Clear Glitter on the corners. For her dress I wanted to keep most of it white but knew that I did not want ot go with red so I used my C1 & C3 to help make ruffles and hair tie look more silver and just went over that with my Silver Wink of Stella Glitter and for her boots I just used N4, N6, & N8. For the lights I used Y13, G19, B02, & R35 followed by clear glitter and glossy accents.
For the bows & candy canes, on the tree (which was cut out using the second to largest die from Spellbinders Holiday Tree 2010 onto pattern paper from American Crafts Merry Mint 6x6 paper pad) colored with R35 then just a touch of glitter for the bows and glossy accents on everything. The ornaments are from some washi tape that I stuck to some scrap paper and then cut out. I just used my glue pen to glue everything thing down.
For the sentiment on the front and inside I used Amy R's Joyful Greetings stamp with Memento Tuxedo Black Ink on to some red cardstock and then took some mini green brads from Recollections to hold it in place.
I placed so holly in the corners then came in with some of the pattern paper to well cover up my oops to be honest with you.
I colored them with G19 for the leaves and R35 for the berries. Then I covered the berries with some glossy accents too.
That's it I just popped her on with some foam dots and waited for everything to dry.
I really love how this card turned out she is just so much fun and I can't wait to used the other ones I got.
I got the idea for this card from a old friend from school. She is going to be have a baby soon and when she posted picture of the baby's room I knew just what to make.
I started with a 3 1/2 x 5 inch white card. I used my Tumbled Glass distress ink and a sponge tool to add some blue for the sky. I went around the edge with Salty Ocean Distress Ink for just a bit of contrast. I used my Fiskers Grass punch on some dark green and bright green card stock for the bottom.
I used the Critters on the Savanna stamp set and dies by Lawn Fawn as well as the Hats off to You stamp set. I stamped them out in Memento Tuxedo Black Ink on some copic paper. I used YR15 & YR17 for the Giraffe, C1,& C7 for the Zebra and E31, E33, & E35 for the lion RV21 for his nose. For the Small party hats I used G00, & G02 (for her card I used RV21 and some Petal Pink Liquid Pearls). I the cut them out by Hand leaving a small white border.
For the hats on the Lion and Zebra I used my craft knife to cut out around their ears so the hats would look like they are sitting farther back. I just used my glue pen to attach them. I first glued down the Giraffe then the dark green grass. I then took the lion placed him where I wanted him the put down the bright green grass. The Zebra was the last one to go on and I wanted him in front on the grass.
I used Memento Tuxedo Black ink to stamp out the Sentiment on front which is from Lawns Fawn's Plus One Stamp Set as well as on the inside. I then took my 3/8 corner chopper to round the bottom to corners.
That's was all it need. I am so glad that I had a chance to enter into this amazing challenge no matter if I win or not.
I hope that you are enjoying this wonderful season so far. I would enjoy it more if I was not sick or if I had a car so I could get some Christmas shopping done. lol ;) It has been really cold here this week.
Here is card #2 in my Christmas series. This is A Cheeky X-Mas from The Greeting Farm. I stamped her with memento tuxedo black ink on to some copic paper. I used E000, E00, & E02 for her skin along with R20 for her cheeks with just a bit on the eyelids as well. I then colored her hat, shoes and dress with R24 & R29. I used C1 for just a bit of shading under her.
For the what I like to call the warm fuzzy part of her outfit I took a paint brush and using my White Opal Liquid Pearls I dabbed it on there to give it the look of well warm fuzzy cotton with just a little bit of shimmer.
Here you can see it really well
I used blue pattern paper from last years Recollections Blue Christmas 6x6 paper pad and the poke a dot green pattern paper is form the Greeting Farms 6x6 paper collection. I used my Spellbinders Standard Circles Die Small to cut her out as well as one for the inside. I glued everything on to a 5x5 red card stock.
I used the same paper on the inside as well. This time I stamped her in Brilliance Rocket Red ink and just stamped if off 2 times so the 3rd would be light enough that you can still write a message to someone. I used a sentiment from Amy R's Happy Christmas stamp set in the same ink color.
I just love the way this card turned out. She is so cute and I just wanted her to be the main focus on the card.
I thought I would start off my Christmas card series with this fun cute stamp that I picked up a Tuesday Morning. It's by Hampton Art and its called Reindeer Tag.
I really liked the way it looked on this Snowflake paper from Recollections that I decided not to color it. I just used Memento Tuxedo black Ink. I used my white gel pen to color in his spots.
I then used some red and green recollections brand cardstock to make the gift box. I took one of the belt buckles that I got from one of my Paper Smooches Kits. I used glue dots to hold it in place. then I used my Wink of Stella Clear Glitter Pen to the red for just some sparkle. I used red and green twine form the same paper smooches kits for the tag (which is being held on with glue dot under the buckle and foam dots for the tag) and the bow.
For the inside I used my EK Success Circle Punch to cover my oops and just stamped my sentiment from Hero Arts Snow Much Joy stamp set using memento tuxedo black ink on red cardstock. Then used the clear glitter pen on the word Sparkling.
I just had so much fun with this card. He was just to cute not to use.
.JPG)
.JPG)
.JPG)


.JPG)
.JPG)


.JPG)


.JPG)


