Friday, October 30, 2015

To Die For Friday - Frankenstein & Ghost Goodie Bags

Happy Friday.
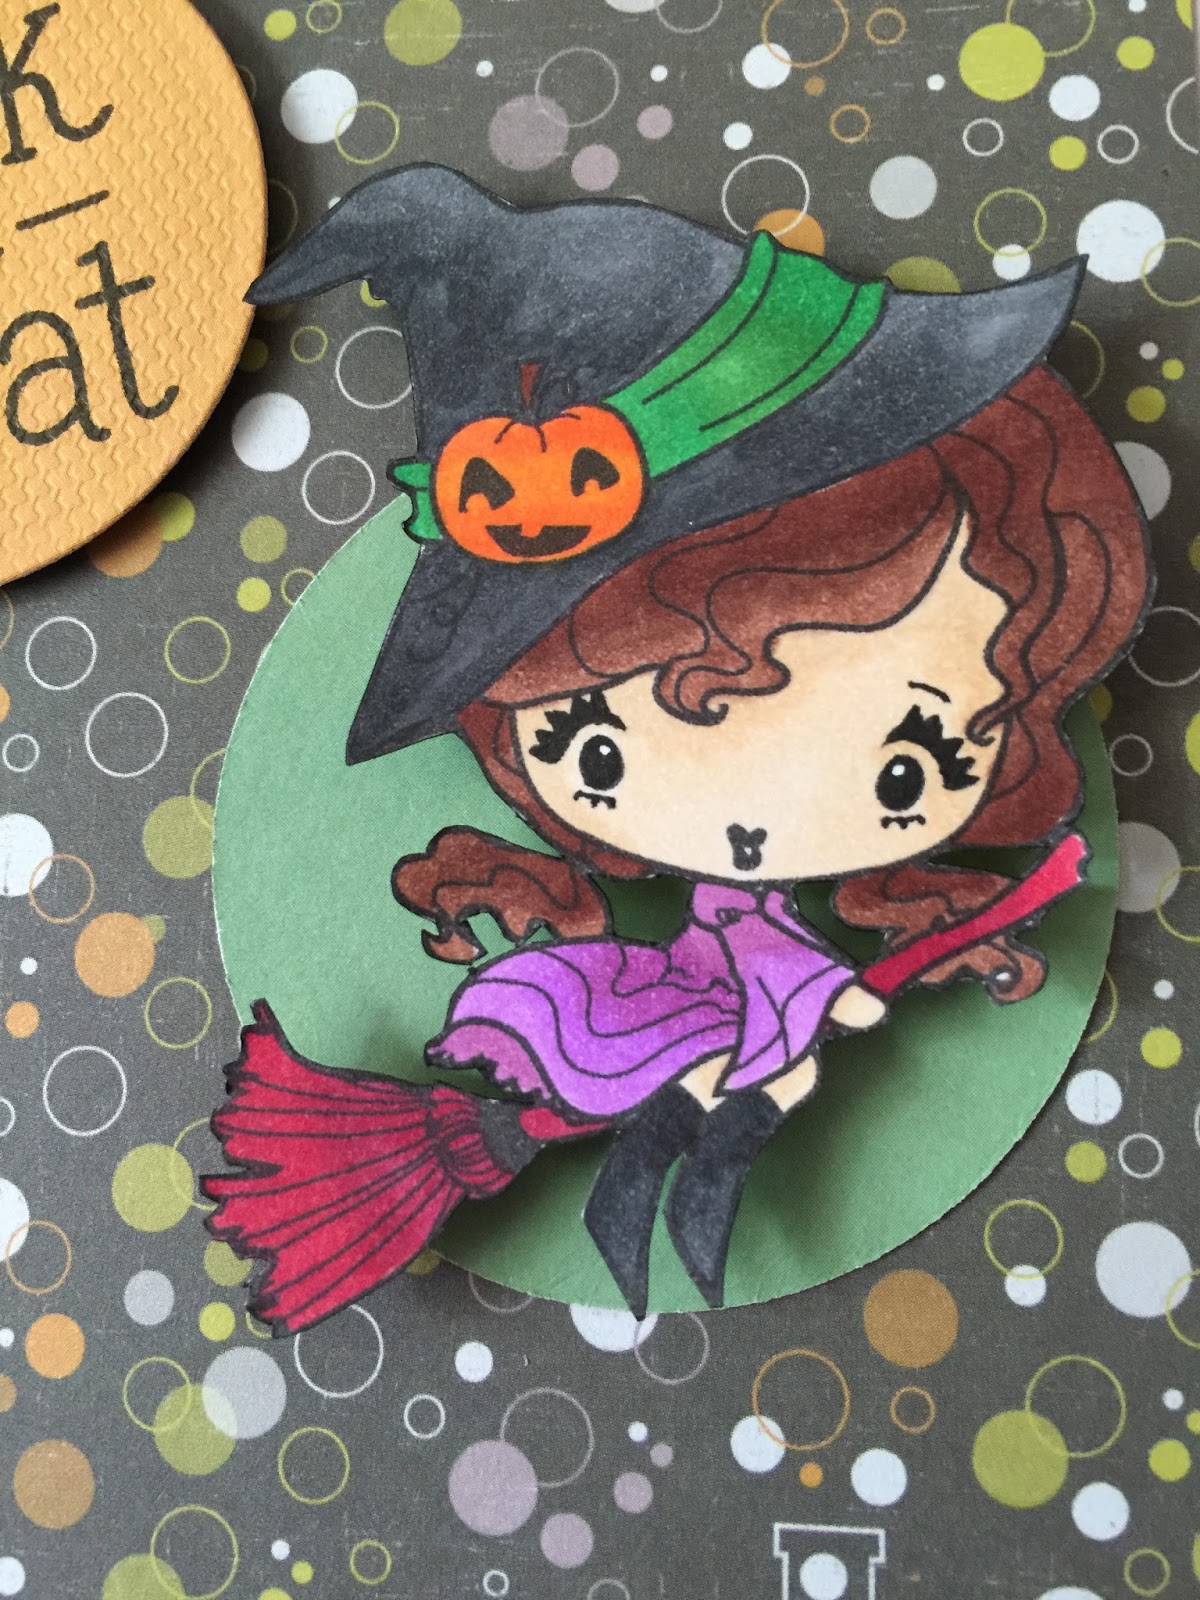
I am so looking forward to the weekend. We get two no alarm days in a row. Speaking of alarms for forget to turn your clocks back on Sunday (or Saturday night before going to bed). Besides the no alarm days we are going to be busy. Saturday hubby is help his friend move the gym to their new location then we will be heading out to get a new bed. And of course we will be going Trick or Treating. Sunday is grocery shopping and laundry and both days we will be cleaning the house (I kinda neglected it the this week) as well as taking down the Halloween decorations. But should be a fun weekend.

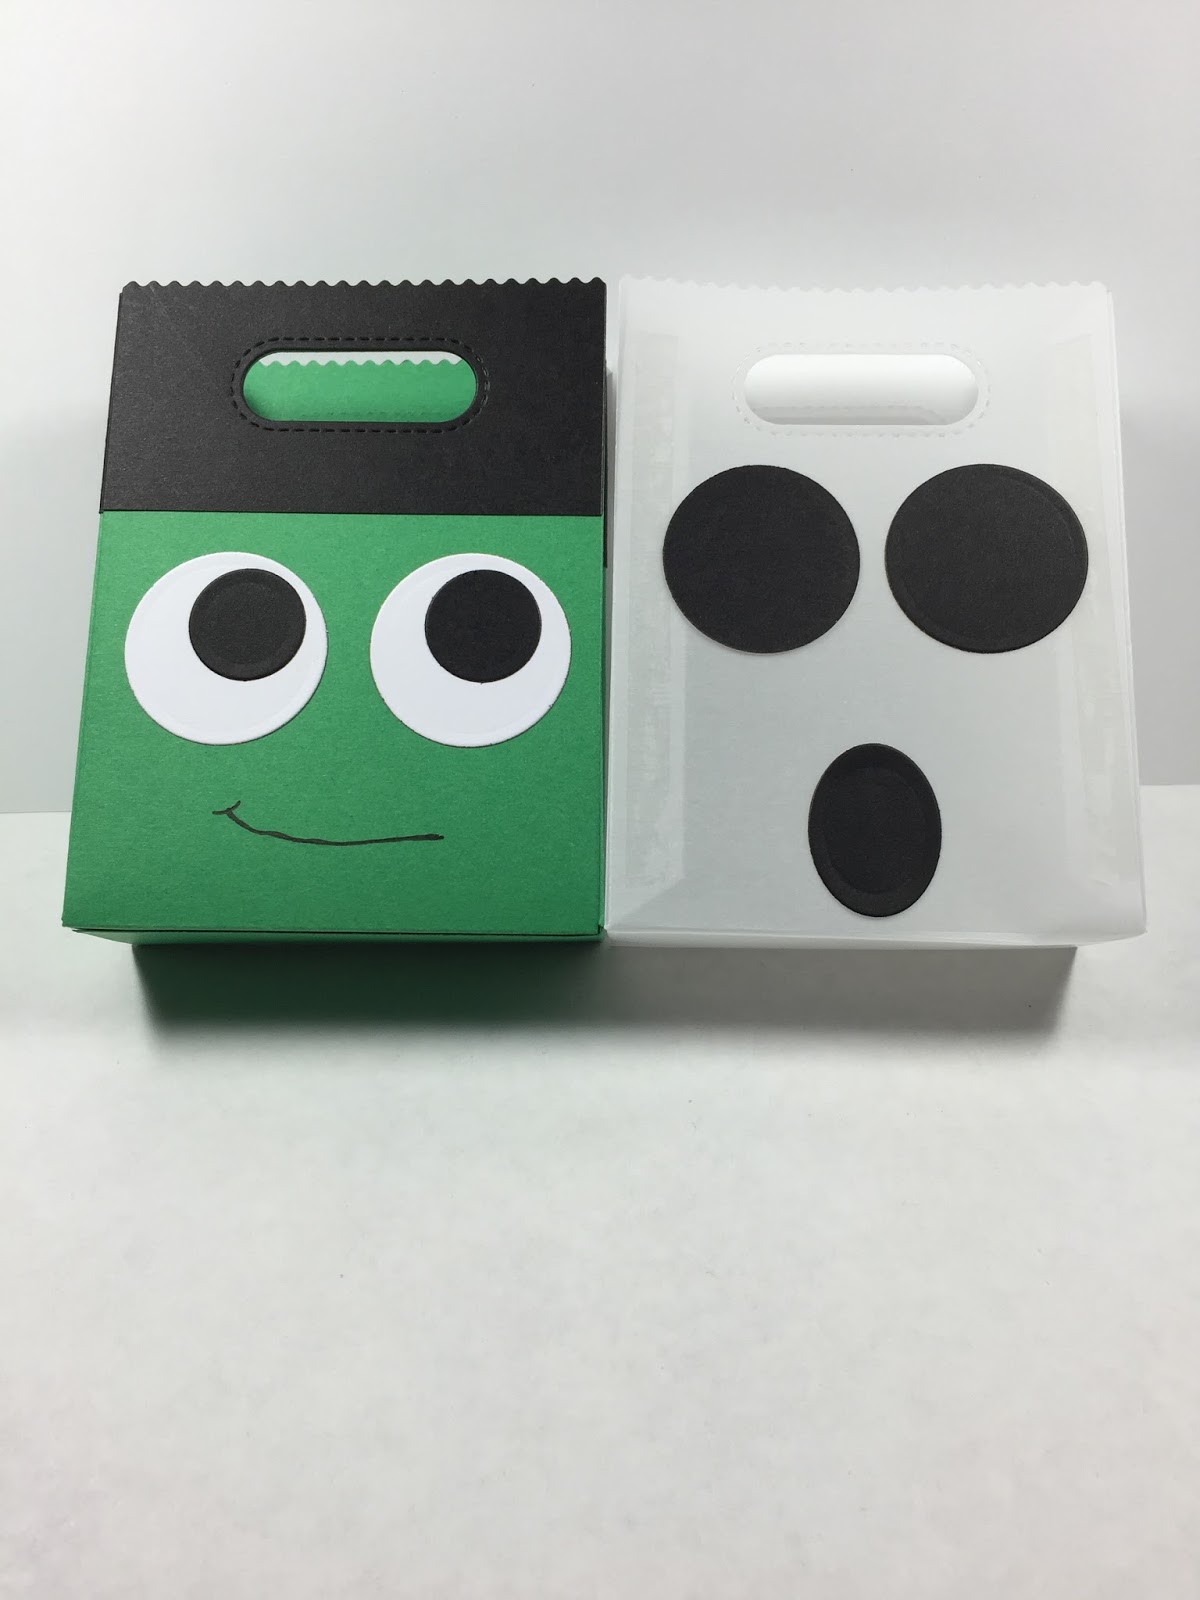
Now on to today's project. I made these cute goodie bags using the Lawn Fawn Goodie Bag die. First I made Frankenstein. I used some green card stock for the bag. I then took the die and some black card stock and die cut out the top part of the bag for his hair. I used Spellbinders Standard Circles (a mix between the small and large dies) for his eye and I have him looking up like he is trying to see what going in the bag. I used the copic marker multi liner in the size 0.5 for his mouth. I used my zippen for the hair and eyes but red line tape for the bag. You want a strong hold for the side of the bag.
For the ghost i wanted to do something different instead of white card stock I decided to use vellum. I mean Ghost are kinda transparent so why not right. I did to passes through my die cutting machine to get all the score lines to show up well. It cut out beautifully. Once everything was folded I used red line tape to hold that bag together (you cant even tell in the picture can you). For the eyes I used the same size circles as I did for Frankenstein but the month is cut out with the smallest size oval from Spellbinders Classic Ovals Small. I now know why vellum is not used much for dies like this, It can be a bit of a pain to fold. But I do really love the way the ghost turned out. I love that you can just see what's in the bag. 
These are just so much fun and easy to put together. If there was more time I would have made a bunch of these and handed them out filled with candy. Also a great idea for any Halloween Party.
Thank you so much for joining me and I hope you all have a fun and safe Halloween. See you back here Monday.

Happy Halloween and Happy Crafting.


Wednesday, October 28, 2015

Inspirational Wednesday - Inspired by a 6 year old Halloween Card

Happy Wednesday
I want to just jump right into today's card. Monday night after the kids Jiu Jitsu class I brought my youngest home (the older one got to stay and watch the adults). After her shower and snack she asked if she could help make a card. So I let her pick out somethings out. So today's card was inspired by her.

She picked out this cute witch. It's a digital image from The Greeting Farm called Halloween Witch. Once we got the size right (she was so excited to know that she get to color the other images) she then picked out the colors, well the color palette, I picked the shades of colors in those palettes. But she pick what colors went where.
 She asked that the band on the witches with the greens. I used G09 & G07. She wanted the pumpkin to be orange so I used YR04 & YR07 with a little E29 for the stem. Her last pick was the broom and she wanted it a bright red but we compromised on a bit darker of a red, I used R37 & R39. I used N6 & N8 for her hat and shoes (although I wish I had used N10 & N8 instead) and for her dress I used V4 & V6. I used E27 & E29 for her hair and for her skin I used E50 & E53. I then took my 0.1 multi liner and darken her eyes, eyelashes and eyebrow (ever girls needs a little makeup right lol).
My youngest also picked out the pattern paper too, this paper is from We R Memory Keepers 6x6 Halloween paper pad. I cut it down to just under 4.25 x 5.5. The card base is from so Bazzail card stock called Lilac Sugar (cut to 4.25x5.5) I then just used some paper from my scraps and used Spellbinder Standard Circles (a mix of the small and large size) to cut out the circles. I then took the Trick or Treat sentiment from the Trick or Treat stamp set by Lawn Fawn. Stamped that on to the yellowy-orange circle and stuck that down with so foam dots at a slight angel. I took my ATG gun and glued down the green one flat. I use two layers of foam dots for the witch and placed her just off center on the green.
For the inside I just used some of the remaining paper and just trimmed off a bit so the card would fold flat. Leaving plenty of room to write a message.


I love having my kids get involved with some of my project and then seeing the look on their face when it is finished. Thanks so much for joining me and we will see you next time.

Happy Crafting


Supplies

Monday, October 26, 2015

Cut It Out Monday - Cricut Party Time Halloween Card

Welcome back to Cut It Out Monday. I hope everyone had a great weekend? We have a fun one, the party on Saturday was great and even though the weather was yucky out on Sunday it was still a good anniversary. We stayed home (we did plan to go get a new bed) hubby played video games while I got some much needed laundry going (I hate doing laundry lol) then even though he got called in to work for a bit we did have a lovely dinner at Benihaha's. Then we came home, he played some Pokemon with the oldest and the youngest got to play on the Wii for a bit. All in all I would say this was the best anniversary since Vegas. Today's project as well as the rest of the weeks is a Halloween project. So enjoy the Halloween fun.

Today was a make it now card. This is just one of the cards that came in the project. It also had a spiderweb card as well as one with jack-o-lanterns. This is a free project if you have the subscription. I left everything the size it was and just picked out my papers. I used mostly scraps for this. I glued everything together with a zig pen (i could not find my tombow) but you do want something that will give you a little time to place the layers in place. 
I think this would be a great birthday card or invitation to any kind of party. You could even use this to give some one tickets to see Wicked, maybe change Halloween to Fun or just remove happy and Halloween. Thanks so much for joining me and see you soon.

Happy Halloween


Friday, October 23, 2015

To Die For Friday - Happy Anniversary Card

Happy Friday guys.
Do you have big plans for this weekend? Saturday we have a party to go to and I am hoping to get my craft room clean and work on the Christmas cards for my neighbor. On Sunday we will be celebrating my 12th year of marriage. We will be doing it family style. Normally we off load the kids with a friend for the whole night and go for dinner & a movie but this year, since hubby is on call and our anniversary is on a Sunday, we decided to go to Benihana's for dinner. This brings us to today's project an anniversary card for the hubs.

I used Spellbinders Grand Labels One for the card base. I just scored about 1/2" from the top to make a fold line. I used red line tape to hold the two pieces of card stock together making this a top folding card. All the card stock is scraps from my stash. I used Spellbinders Classic Heart for the front. I took a stamp from Simon Say Stamp Inside & Out Sayings for the sentiments. Stamps this with Versafine black.
For the inside I started with the coordinating stamp for the Inside & Out sayings. Then used this Happy Anniversary stamps for Simon Say Stamp Happy stamp set. I used the same ink.
My husband is learning Japanese for his job (it was his choice to learn this) so I thought it would be fun to try my hand at writing the characters. He can write and read Japanese a little but his speaking is better. I this picture I am showing you the card with the writing on it and a screen shot of what i wrote. This says "I love you" and let me tell you writing those characters is harder then i thought it would be. I am so proud of him.

Thanks for joining me. 
Happy Crafting


Supplies


Wednesday, October 21, 2015

Inspirational Wednesday - Gift Card Holder

Happy "Back to the Future Day". 
Welcome to another Inspirational Wednesday post. I hope everyone's week is going well. I think i has improved I don't feel so brain fried today. I am looking forward to the weekend and getting my craft room rearranged as well as getting my stamps set up in my new system. Not to mention that Sunday is my anniversary which I did kinda forget about but I get one right. 

Any who on to today's project. I got in a pocket letter swap over the summer this cute stamped out image and thought this you look really cute on a card to go into a home spa type basket. This is then when I remembered I have a stamp set from the Greeting Farm called Me Time Anya (which is on sale right now on the site just click on the name for the link) and even though the images with that stamp set are to big got today's project I know that the sentiments would fit beautifully. After that everything just fell into place. Here is the image that started the whole thing. 

 I had two of these images so I made two different card holders. and I think they are just so stinkin cute. Here is a look at both. 

I used the same copic colors I just changed where I used them on the images.
For this one I used C0, C2,C3 for the tub with a little colorless blender to make it look a bit lighter around the candles. I used V17,V22,V20 for the candle base and FYR1 and FY1 for the flame. For the bubbles I used a little B000 to give them a little color but still give them a translucent look as well. For her hair I used E31 & E34 and her skin was E30 & E31. I took B00 for the top part of her cap and the filled in the flowers and band with B02. Y19 for the ducks body and a touch of FYR1 for the beak. I took some clear wink of stella and used just a touch on her eyes and the bubbles. Then i used glossy accents on those as well as the flames.  I then stamped the sentiment on the front with Memento Tuxedo Black ink.
 For the insert I cut a piece of scrap white card stock to 3" wide by about 5 1/4" (I really just eye balled it). I used some of that scrap to make the pocket measuring to be 3" wide by 1.5" tall. I use some strong tape to hold it in place putting the tape as close to the edge as possible to have plenty of room for the card to slide in.
  I use the same ink for the inside images as the front. I then just took the B00 and B02 to give the flower a two tone look and colored the center in with a little Y00. This card is just what I happen to have on hand to so you the finished look.
This one I just used the purples for the cap and the blues for the candle. 

This is just such a cute gift card holder or it could hold some money too. I love when I not only come up with something simple but when it makes me think of other stamps I might have that I have not used. Thank you for joining me. I hope you get Inspired today too.
Happy Crafting


Supplies


Monday, October 19, 2015

Cut It Out Monday - Cricut Explosion Birthday Card

Welcome to another Cut It Out Monday. How was every one's weekend? I hope you got some time to relax. The girls and I spent the weekend at a birthday party while hubby helped someone move. Then hubby helped the oldest on a school project. I know it was not much but it ended up filling our time. We also got their Halloween costumes too. 

But your here for today's project. I made this fun birthday card for my son's birthday next month. I cant believe that he is in 7th grade this year wow time sure did fly by. I found this card in the Make It Now section of the Cricut Design Space under Birthday. I love the 3D look of this card.
 For the inside (at the moment) I kept it simple with just using a stamp from Simon Says Stamp Mother's Day stamp set. I know but for me this was a fitting sentiment since we have not seen each other in 2 years.

I not only love the fact that this was an easy card to make but with just to colors of card stock it makes a big impact. Thanks for joining me and look for my next post.
Happy Crafting

Friday, October 16, 2015

To Die for Friday - Watch What You Eat Pillow Boxes

Happy Friday everyone. Do you have any big plans for the weekend? We have a birthday party Saturday and some shopping to do on Sunday. Hoping to get some things done in the craft room as well. 

Let get into today's project. These are so cute and great size the the little ones. 
 
This is the Pillow Box Die from Lawn Fawn. I used an 8.5x11 orange piece of card stock from my stash and I got two pillow boxes out of that. Once I had that boxes cut out I used the Spellbinder Pumpkin stacks die to cut out the window. I got a piece of acetate and cut it to fit inside all the folds and used some red line tape to hold it in place. I used the same tape on the flap so I could put my box together. Once everything was together I took a loot bag, that I got at the dollar store, to hold my mini candy corns. I used my bone folder to help get the bag inside and pushed into the corners better. I then just filled it up with candy. Once i had the desired amount in just pushed in the remainder of the bag and closed up the other side. I then shook it so the candy would even out.
For this one I added a small pumpkin tag to the center of the window. I used a small size in the pumpkin die set and cut it out of the pumpkin scrap that was left from making the window. This not only saved paper (and using up scraps) but i also help me to see what size pumpkin to use. I then just was the Happy Halloween stamp fro Hats Off To You by Lawn Fawn and stamped it with Memento Tuxedo Black ink. I then used the same tape and stuck it in place. 
I think these would be great idea for handing out things at a party or if you have just a few trick or treaters and you don't want to buy a ton of candy. You can use this die for gift cards as well.
Thanks so much for joining me. I hope you all have a wonderful weekend and I will see you on Monday for our Cut It Out Monday project.
Happy Crafting


Supplies


Wednesday, October 14, 2015

Inspirational Wednesday-Pinterest Inspired Candy Corn Shaker

Welcome to the first blog post for Inspirational Wednesday. 
Today project was inspired by a card that I saw on Pinterest over the weekend. I thought it was cute and I thought to myself that this would make a great shaker card. So that is just what I did. Here is a picture of that card with an attached link.

I did change up the color and size of my card. I used some Bazzill card stock for the front and used the medium size candy corn spellbinders die to make the windows. I then took so acetate for the window and just cut that down to fit just bigger the the die cut opening. I then took my Scotch 3M foam tape (which I got at office depot) and did a double layer so everything would shake around nicely. Once all that was done i used my powered tool to make the edge of that tape not sticky. I used some of the candies from Lawn Fawn stamp set Spooktacular. I then just did a quick wash of color with my copics (Y19,YR68,C0) and die cut them out. I added Doodlebug sequence in the matching colors (looking at it now it could use more sequence lol). I closed it up using candy corn pattern paper from last years Doodlebug 6x6 paper pad Ghouls & Goodies. With a bit more foam tape I stuck the purple paper on to a white card base that measures 4.25x4.25. I used one of the sentiments from the stamp set and stamped it with Versafine ink.

I not only love the way it turned out (I could have done a few more things but maybe that will happen in a Throw Back Thursday with a twist Video) and its size. I think this is a great card to make for someone that just needs a little candy and fun.

Thanks for joining me and I hope you all have a Inspiring Wednesday.
Happy Crafting


A little inspiration for you.

Monday, October 12, 2015

Cut it Out Monday - Halloween Cake Pop Wrappers

Hello all & welcome to the first Cut It Out Monday project.

I love how cute these are. You can find these in the Make It Now section under Halloween on the Cricut Design Space and is a free project if you have the subscription. These would be great for little ones that don't like the scarier part of Halloween or for school parties. You can adjust them to any size you want so you can use small treat bags or it can hold a pencil. I only made three but the project it self has 5 different wrappers Vampire, Spider, Jack-o-lantern, Skull and Frankenstein. 
 I used two different color purples for this Vampire.   
 The sticks are just some wood dowels that I had left over from a baby shower project (I used these since my dumdum was not staying in place) and you can get them just about anywhere.

They turned out so cute and cant wait to make the others. Thanks so much for joining me.
Happy Crafting