Thursday, May 25, 2017

What What Wednesday - A Magical Birthday Card for my Dad

     Welcome to another Wednesday video and blog post. Things have still be crazy and this video will show how out of practice I am with doing voice overs and editing. But I had a lot of fun making not only this video but the card for my dad. There's a lot going on so I am going to just jump right in.
     As some of you know me, my husband and my kids are big Harry Potter fans. We watched all the movies just before we left back in Oct 2016 to Universal Studios. It was a birthday present to my oldest to go to Wizarding World. So when Sweet Stamp Shop came out with these two stamp sets I knew that I had to get them and they would be perfect for using in their scrapbooks. With my dads birthday coming up I was having a hard time coming up with a card for him. I then remembered these stamps and new right away what I was going to do. My dad is also a fan of the movies too.
I started out by stamping out all the images I was going to be coloring using my Misti tool and used Lawn Fawn Jet Black ink. I then went through all my copic markers and pick out all the colors I would be using. There are a lot of colors.
     I wanted Fawkes like he did in the movie. So I started out with R37 as my darkest color on him and just went from there. So the colors I used in the starting from the out side in was R37, YR09, YR69, Y17, Y18, Y15, and YR07 for his feet and beak.

     For Dumbledore I started with his hair and used C1 & C3. For his hat I used C4, C6, R39, R59, Y19 & Y15. For his skin I used E31 & E33. For is dressing gown and robes I used C4, C2, R39, R59, Y19 & Y15. 
     Then there is Harry and Hermione. They had a lot of the same colors the only thing what was not was their hair. So let start with what was the same skin was E30 & E31, coats W8 & W9, shirts T3 & T1, pants T3 & T5, shoes W9 and scarfs are R39, R59, Y19 & Y15. For Harry's hair I used E47 & E49 and on Hermione I used E23 & E27. From The broom I used E37 all over and then some E59 for detail on the brush end and for the hat I used E57 all over and E59 for some detail. I then used my Brother Cut and Scan to cut out all the the images.
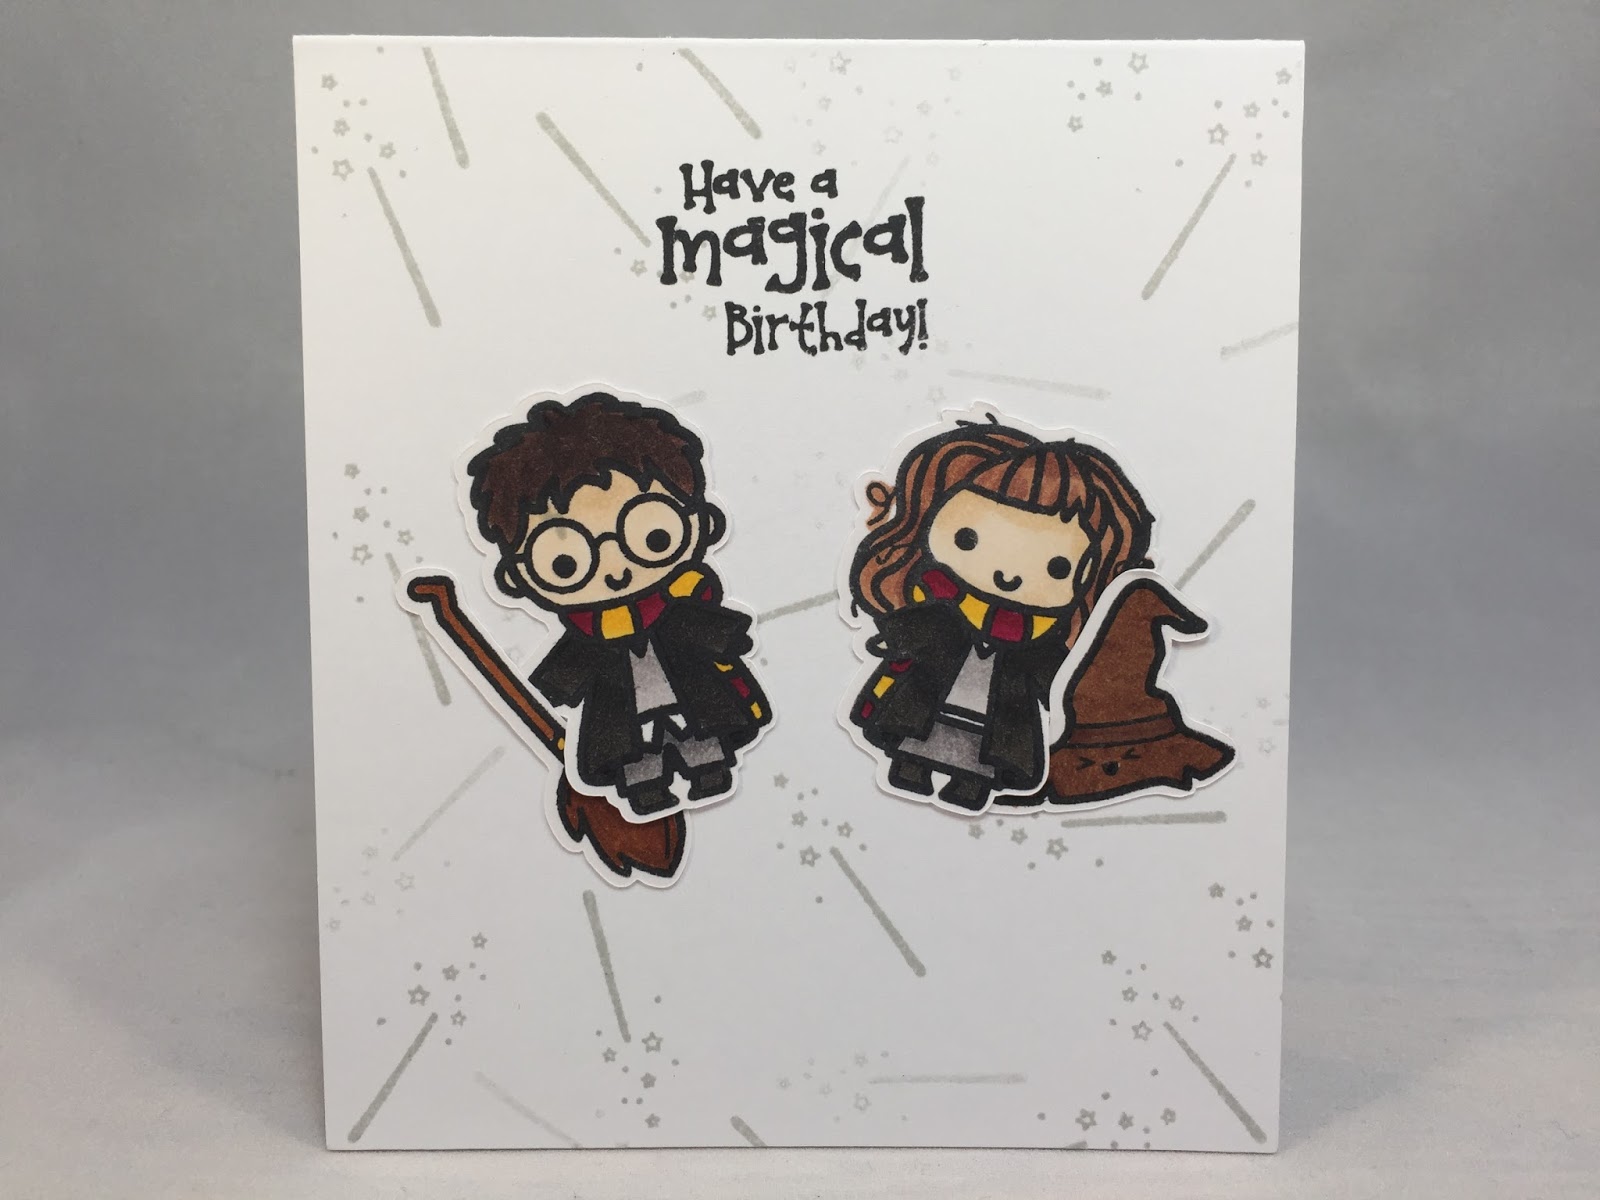
     For the background on the card which is top folding 4.25x4.25 size card I used Lawn Fawn Manatee ink and stamped out the wand that came in the set. I then took the sentiment and stamped it using Jet black ink. 
     For the inside I just glued sown Fawkes and Dumbledore and stamped out another sentiment with jet black ink. I left plenty of room to write a message for my dad. I love how this card turned out it is just so much fun and I hope that he liked it. Anyways thank you all for joining me and I hope you all have an amazing day.


Happy Crafting


Supplies
 

Wednesday, May 17, 2017

What What Wednesday - Craftroom Tour 2017

     Hello all and welcome back. I am so excited to be getting back into making videos. I am getting back into it slowly but at least I am back at it right. Things have been crazy and they haven't really slowed down like I had hoped. But I finally finished cleaning/rearranging my craftroom. I wanted to share with you guys what I have changed and what had stayed the same. I filmed this quite a while ago and and have just not had the chance until now to upload the video. So sit back and enjoy.

Happy Crafting


Monday, February 13, 2017

Cut it out Monday - Valentine Series #7 - Scrapbook Layout/Picture Frame Layout

     Hello everyone and welcome to the last project in my Valentine Series. I am a little sad that this series is over but that just means its time to work on other amazing ideas. I have so much going on in the next few months that I am just not sure where to start.

     How about with today's project. As I was searching around on cricut design space's valentine images I came across a valentine themed scrapbook layout and thought this would be fun to make. I added it to my image bar and continued looking. Once I had a few ideas on marked I add them to my canvas and really started to play around with what I had but I keep going back the the scrapbook layout. I finally decide that this was going to be the project to end my series with but I could not figure out where it was going to go. I don't have any valentine pictures of myself as a kid or of my girls. But then I thought why not make it into a layout of a picture frame.
      I think this really makes a fun way to display your favorite Valentine picture and you can always change out the picture every year but keep the layout. I left the cut out from the center of the heart circle so I would have a template to trim my photos to so I knew they would fit. I add some clear wink of Stella to the lips for just a little pop of sparkle.
     With that this finishes my Valentine Series. I hope this helped you find some fun ideas for your Valentine. I had a blast making each and everyone of these projects and I want to thank you all for joining me. Have a beautiful Valentine's Day weather its with your loved one(s) or just doing what you love.

Happy Crafting