Monday, March 7, 2016

Cut It Out Monday - Easter Project #4 - Happy Easter Banner

     It's Monday again. Did you all have a good weekend? Mine went by fast but it was good. I didn't get as much done as I wanted but we did finally get around to putting together the drawers for under our bed. I also picked up the last bit of stuff for the girls Father/Daughter dance later this week and made plans to get pedicures done with a friend and do a little shopping and crafting afterward. This week is going to be busy but a good one.

     Anyways on to today's 4th Easter project. I wasn't sure what I wanted to do for today's project so I went looking on the Make It Now section of the Cricut Design Space and the first thing that popped up was this cute little Easter Banner. I could not resist making it. I thought it would look really cute hanging in front of the kids baskets or on the wall behind them or just some place in my craft room. I didn't change much to the banner other then the colors and letters. This was another great way to use up some scraps from my stash. 
     
     I did stick to the blue and green banner flags I just changed the font that was used, I didn't care for the one that comes on the banner but it also had the font I used hidden in this project. I also wanted the bigger banner flags to be white. I glues down the the banner pieces together using Tombow Mono first. I wanted to use all the colors associated with Easter (pastel like colors) so since I had used the blue and green for the banner I decided to use light pink for the letters. I glued them down with Tombow Mono making sure I had the right number of letters going on the right number of banners.

                         
  I used some pale yellow ribbon from my ribbon drawer. I just used some Scotch Quick Dry glue to hold those down to the ribbon. This is a great glue to use for something like this it dry like hot glue but with out the heat. I used my grid mat to line them up so I could get the right amount of spacing. 

     This I just a closer look at the banner hanging on my wall. I think this is really cute and would make a great Easter decoration for next year too. You could even make the banner bigger if you are having a get together for Easter. I also found (after I had already had most of my pieces glued together) you can have the banner flags line up at the top for just a little something different. 

     Thank you all so much for joining me today. I will be having an update video for you guys here this week as well as a haul video. Have a great rest of your day.

Happy Crafting


Friday, March 4, 2016

To Die for Friday - Easter Project #3 - Chocolate Bunny Pillow Boxes

     Well happy Friday everyone. How did your week turn out? Good I hope, mine was so so. But we don't need to talk about that lets talk about something else something fun, something crafty, something.... Chocolatey! With Easter coming up we have all seen the sweets in the stores and some of them have probably made it in to your house already (I know we have some) weather it's Peeps (we always get those the kids like to battle them), jelly beans or Chocolate bunnies.  I thought why not take those ideas and use them for a Easter project.
     A friend of mine came over a while back and let me stamp out most of the stamps from Mama Elephant's Lunar Animals. I decided to use the little bunny from that set and make some pillow boxes using Lawn Fawns Pillow Box die to add to my kids Easter baskets.                               
     I used pattern paper from the new Doodlebug 6x6 paper pad Bunnyville. I took the jelly bean pattern and die cut that out one for each of my kids. Since this is one of the small dies it will fit on the 6x6 paper. I used score tape to hold the box closed. I took some dark pink and light pink scrap cardstock to stamp out the sentiment I made using Harold's ABC's from Lawn Fawn. I stamped it with Memento Luxe Tuxedo Black Ink. I trimmed my scraps down and gave them a flag end.
     I took the little bunny that I had already stamped with Memento Tuxedo Black Ink on some copic quality paper. I used my copic markers to color in the bunny. I wanted each of my kids to get different chocolate bunny. For this one I colored it more milk chocolate and used E33, E34, E35. Once the coloring was done I fussy cut it out and used my brush tip copic multi liner to cover up the white edges. I then glued it to the dark pink paper and trimmed off any over hang and glued the bunny and flag to the pillow box. I did leave the ears unglued so I can pop them up a bit.

     For this one I wanted more of a dark chocolate look. I took E25, E27, and E29 and colored it in. I then cut it out and used the copic brush tip for the white edge. I then glued it down to the light pink banner and added it to the pillow box. 

     I have some candies to add in to the boxes once we are ready to fill up their baskets. I think these turned out really cute and cant wait for my kids to see all the fun things I have made for their baskets this year. Thank you for joining me and I hope you all have a great weekend. 

Happy Crafting


Supplies

Wednesday, March 2, 2016

What What Wednesday -Easter Project #2 - Dinosaur Easter Egg Hunt Card

     Well it's Wednesday again and you know what that means. Time for another What What Wednesday post. I never really did any Easter cards or projects before but the creative juices started flowing and I cant wait to share them all with you.

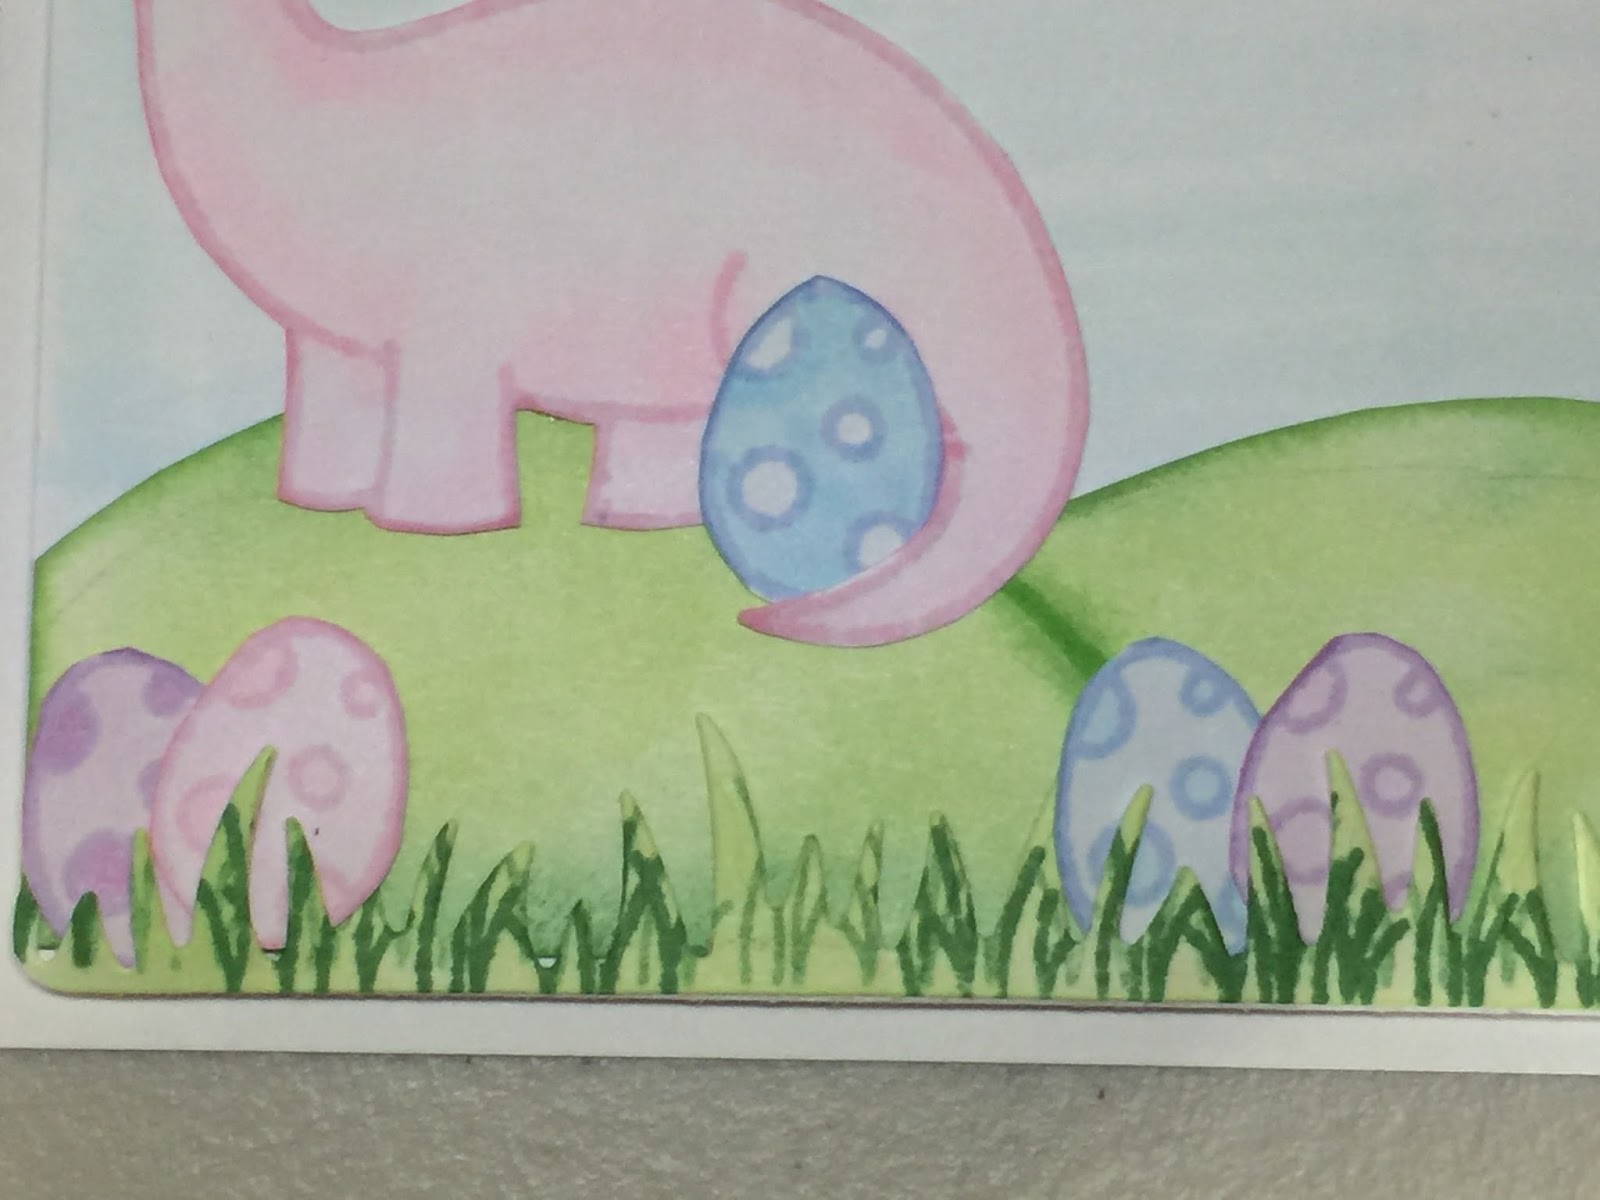
     Today I have a card for you and let me just say this turned out amazing. I not only used a stamp set not normal associated with Easter but I also found while making it that this would also make a great baby card.

      It's it cute. I didn't have any Easter type stamps so I looked through the Stamps set I had and the only one I had with an egg was the Critters from the Past by Lawn Fawn and thought this would be a great way to think out side the box (or in this case the egg lol). I stamped out all the eggs with the same inks I used for the images and colored them with the same copic markers. For the background I used the B0000 to give a little color with out taking away from the images (or washing to the T-Rex)

      Let's start from the bottom just for a nice change. I wanted to make this card with out using any dies but when I was deciding on placement I really wanted to hind some of the eggs behind the grass but could not figure out how to do that by stamping out the grass from Critters on the Savanna so I used the Grassy Border Die from Lawn Fawn. I first sponged on some Memento New Sprout and a little Memento Cottage Ivy. Once it was die cut I used the the grass stamp and did some first and second generation stamping using the same two inks for a little some extra. I stamped out 9 eggs in total and put 6 of them on the ground behind the grass. I used all the same copic markers from the dinosaurs for the eggs too. For the hill I just free hand cut that after sponging on the same two green colors. I did use a little G19 and then sponge over that with a bit of the Cottage Ivy to give it more depth. I then just used Tombow Mono to glue everything down.I used the ink pads to cover up some of the white of the cardstock after cutting out the images. This was a bit of a struggle up really like the way it made them look.

     I used just a few colors through out this whole card. I stamped out the brontosaurs using Memento Angel Pink Ink for a softer look the black. I then colored it with  RV0000, RV000 and RV00. I then took my 0.03 Copic Multi Liner and add the eye, nose and mouth since those got a little lost. I fussy cut it out. This egg is colored with B00 for the main body and the dots are colored with B0000. 

     For the pterodactyl I stamped it with Memento Lulu Lavender ink. I took V000, V00 and V01 to color it in and again used the same copic multi liner for the eyes, nose and mouth. I then took an egg colored with RV00 and RV0000 and glued it on to its back. I then used some foam tape to pop it up so it looks more like its flying.

     For the T-Rex I used Memento Summer Sky and then took B0000, B000 and B00 to color it in. I used V01 and V000 for the egg. I tucked it in behind him so it looks like his is either trying to surprise the others or hind it from them. I used the same multi liner on this one too. Glued him down with Tombow Mono.

     Once everything was glued down I used some foam squares to pop up the panel on to the card base. It's a A2 size top holding card base. I used my We Are Memory Keepers 1/8 corner rounder for the panel as well as that card base. I didn't give it any sentiment most because I did have one and was having a hard time coming up with a fun one so I just left it blank front and inside.

     As you could see if you just leave off the eggs this would be a really cute card for a baby shower or even as a congratulation on the new baby type card. I not only like the fact that I found a great color combo for baby cards but that this is just a fun Easter card that's not the normal type. Thank you guys so much for joining me and I hope you have a great rest of your week.

Happy Crafting


Supplies